Fall in New England Means One Thing: Apple Season

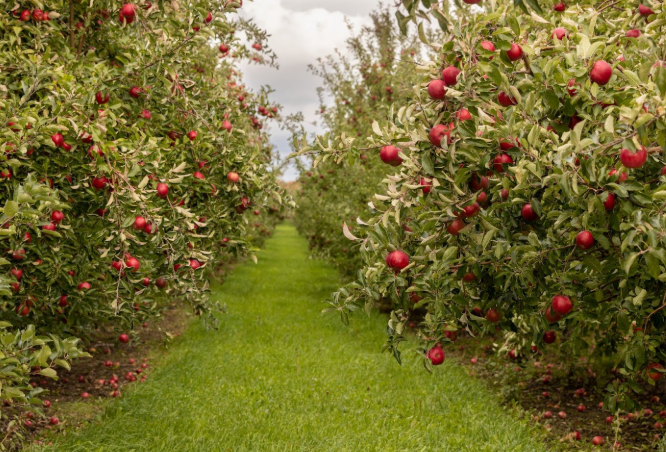
 A New England apple orchard with rows of trees full of ripe red apples, green grass between the rows, and a soft, partly cloudy sky overhead.

Welcome to Peak Apple Season in New England
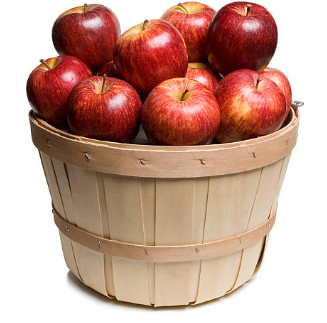
A wooden bin filled with freshly picked red apples, with green orchard trees in the background.You gotta love Fall in New England. The gardens may be past their prime — no more tomatoes, cucumbers, or carrots — but the squash and zucchini are still hanging in there. And now the other seasonal stars have moved in to take over. I’m talking about cranberries and apples.

Apple orchards are everywhere in New England, so crisp fresh apples are in abundance, whether you’re picking your own, stopping at a farm stand, or just walking into your local grocery store. With that in mind, I thought this would be the perfect time to revisit one of my favorite fall recipes.

I learned this one last year. Before that, I made it in a regular old pie pan, but being the cast‑iron fanatic that I am, when I found a skillet version I had to try it — and oh my, what a success. So back by popular demand is my Easy Skillet Apple Pie. Yes, I cheated and used refrigerated pie dough, and yes, it still came out amazing.

Easy Skillet Apple Pie

Ingredients:

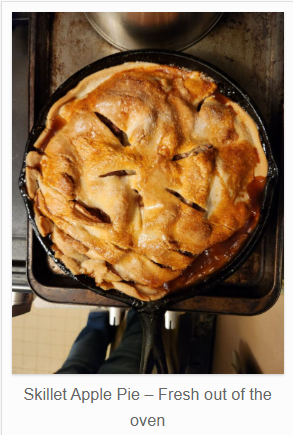
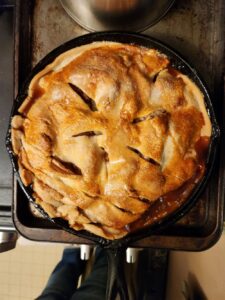
  • 2 lbs. Granny Smith applesA golden‑brown apple pie baked in a cast iron skillet, with slits in the top crust and bubbling filling around the edges.
  • 2 lbs. Braeburn apples (I used McIntosh)
  • 1 tsp ground cinnamon
  • ¾ cup granulated sugar
  • ½ cup butter
  • 1 cup firmly packed brown sugar
  • 1 (14 oz) package refrigerated pie crust (2 crusts)
  • 1 egg white
  • 2 Tbsp granulated sugar
  • Ice cream or sharp cheddar cheese (optional)
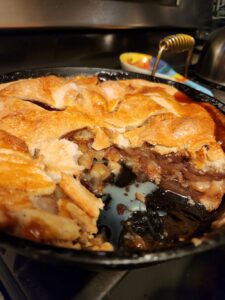
A golden‑brown apple pie in a round baking dish with a slice removed, showing the warm fruit filling inside.Directions

Step 1: Prepare the Apples Preheat oven to 350°F. Peel apples and cut into ½‑inch wedges. Toss with cinnamon and ¾ cup granulated sugar. Set aside.

Step 2: Prepare the Crust Melt butter in a 10‑inch cast iron skillet over medium heat. Add brown sugar and stir constantly for 1–2 minutes until dissolved. Remove from heat and place one pie crust over the brown sugar mixture.

Step 3: Add the Filling Spoon apple mixture evenly over the crust.

Step 4: Add the Top Crust Top with the second pie crust. Whisk egg white until foamy and brush over the top. Sprinkle with 2 Tbsp granulated sugar. Cut 4–5 slits in the top to allow steam to escape.

Step 5: Bake Bake at 350°F for 1 hour to 1 hour 10 minutes, or until golden brown and bubbly. Shield with foil during the last 10 minutes if needed to prevent over‑browning. Cool on a wire rack for 30 minutes before serving.

Serve with ice cream or a slice of sharp cheddar cheese.
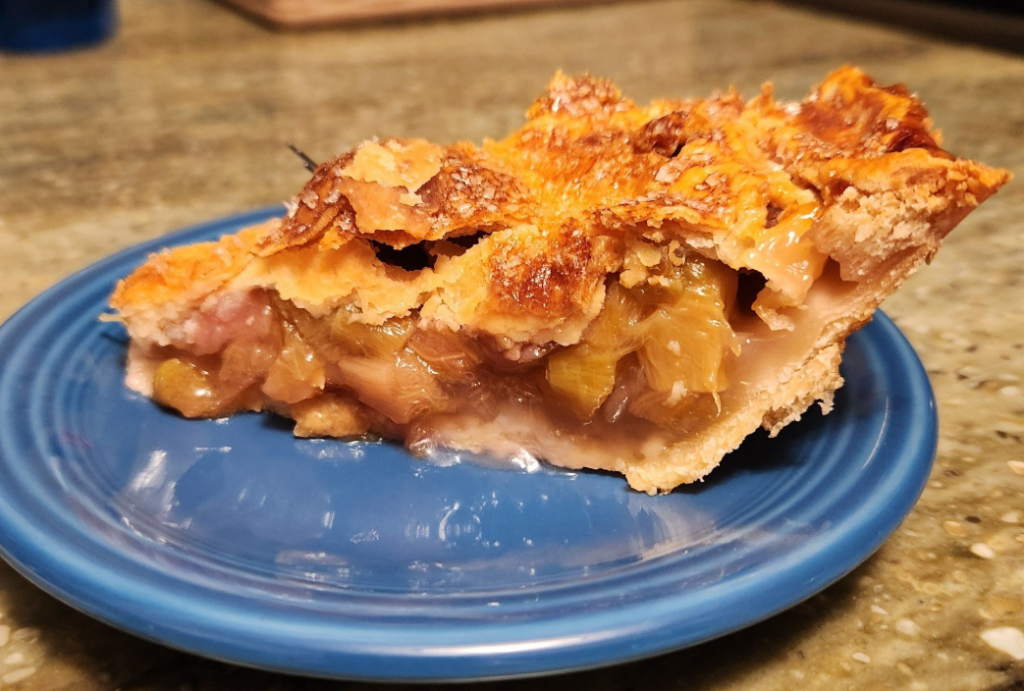
A slice of fruit pie with a golden, flaky crust on a blue plate, showing the warm, juicy filling inside.

Notes & Tips

  • Use a drip pan or line the bottom of your oven with foil — this pie will bubble over, and cleanup without protection is no fun.
  • Surprisingly, the tougher refrigerated crust holds up beautifully against the gooey filling.

Now I’m stuck with a delicious 10‑inch apple pie. Guess I’ll just have to take one for the team. I’m going to enjoy every bite — and I hope you do too.


To Puff or Not to Puff (and no, I don’t mean cigarettes)

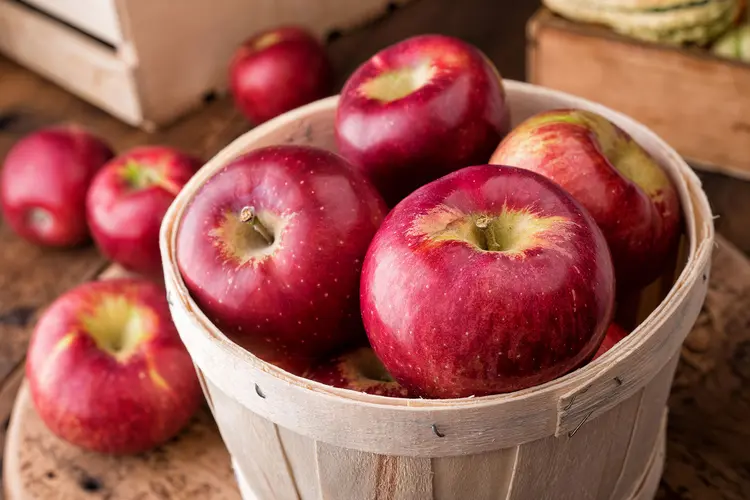
A rustic wooden basket brimming with deep red apples, glowing like a perfect fall harvest.

Apple Season: Pancakes Two Ways

It’s apple season again. Sure, you can buy apples all year long, but there’s something special about making apple dishes when the orchards are full and the air turns crisp. Now that your cast iron pans are seasoned and ready to go, it felt like the perfect time to compare two apple pancake recipes.

If you’re like me and have a weight issue, pacing yourself is important. I used to eat one of these every morning for breakfast, but eventually I had to cut waaaay back. Too many calories… but oh my, they’re so good.

For years I was perfectly happy with my homemade imitation Bickford’s Big Apple Pancake. Then one day I saw a photo of an apple pancake that looked more like a big, puffy soufflé. I couldn’t find a recipe, so—with the help of my AI assistant—I created my own version. All I can say is: it’s good… but so was my original.

So let’s compare.

The Big Apple Pancake (Bickford’s Copycat)

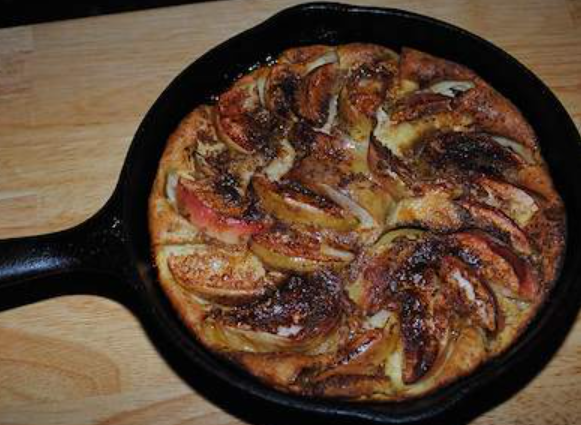
Golden apple pancake baked in a black cast‑iron skillet, with caramelized apple slices arranged in a circular pattern on top.

This version is designed to puff in the oven and fall when removed. It settles into a custardy, apple‑soaked pancake. My first apple pancake was at Bickford’s, so this one is a nostalgic, comforting indulgence.

Ingredients

  • ½ cup all‑purpose flour
  • ½ cup milk
  • 2 eggs
  • 1 tablespoon margarine or butter, melted
  • 2 medium apples, peeled, cored, and sliced
  • ½ cup packed light brown sugar
  • 1 teaspoon ground cinnamon

Directions

  1. Combine flour, milk, and eggs.
  2. Pour melted margarine into a 9″ pie plate or cast iron skillet.
  3. Pour batter into the pan.
  4. Arrange apple slices in the batter.
  5. Combine brown sugar and cinnamon; sprinkle over the top.
  6. Bake at 425° for 25 minutes.

Note: Don’t rush the baking. Once fully cooked, the pancake will release and slide out easily. If you try to remove it too soon, you’ll get mush.

Dusty’s Apple Soufflé Pancake (Puffy Version)

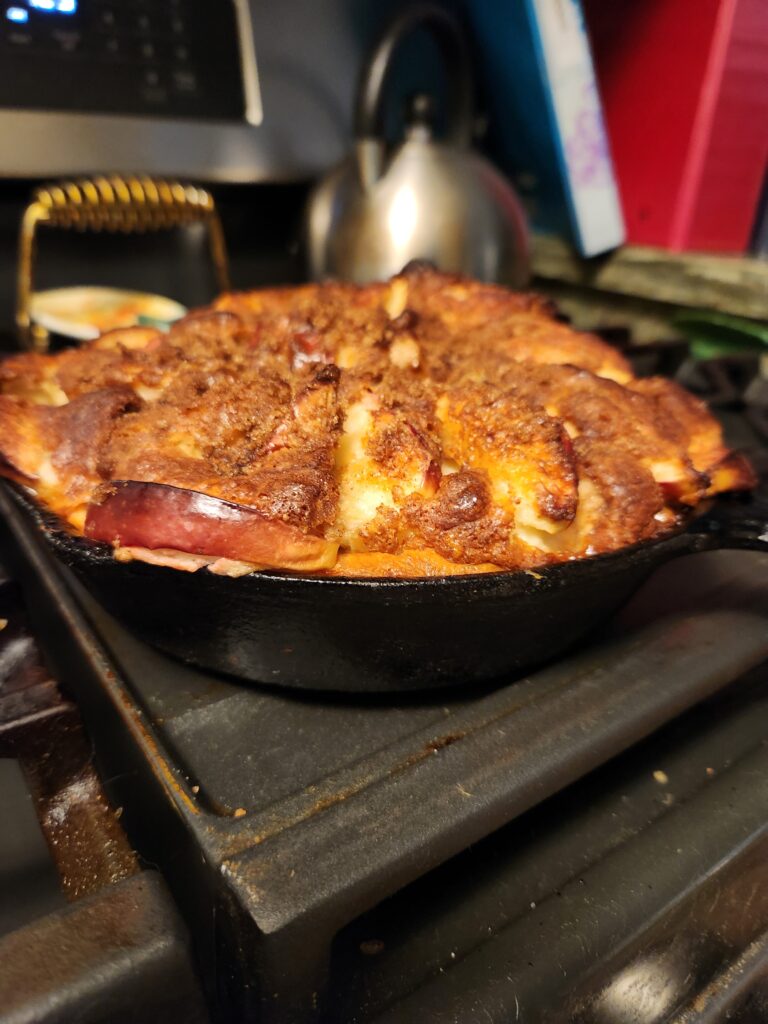
Golden, deep‑dish apple pancake baked in a black cast‑iron skillet, with a caramelized top and crisp browned edges.

This is the dramatic one—the big rise, the soufflé look, the “wow” moment when you open the oven.

Ingredients

  • ½ cup all‑purpose flour
  • ½ cup whole milk
  • 3 eggs
  • 2 tablespoons melted butter
  • 2 medium apples, peeled, cored, and sliced
  • ½ cup packed light brown sugar
  • 1 teaspoon cinnamon
  • Pinch of salt
  • 1 teaspoon vanilla

Directions

  1. Preheat oven to 425°. Place your 9″ cast iron skillet inside for a full 10 minutes.
  2. In a blender or with a hand mixer, whip together:
    • flour
    • milk
    • eggs
    • vanilla Blend 20–30 seconds until frothy.
  3. Prepare the apples.
  4. Mix brown sugar and cinnamon in a small bowl.
  5. Melt butter in the hot skillet.
  6. Pour batter into the skillet and swirl gently to coat evenly.
  7. Add the apples, arranging them around the edges—not the center—to allow the middle to puff dramatically.
  8. Sprinkle the cinnamon sugar.
  9. Bake 25–30 minutes. Do not peek.

When I tested this recipe, I didn’t keep the center clear of apples, so I lost some of the dramatic rise—but it still puffed beautifully between the slices.

This was the picture I saw that started me on this quest

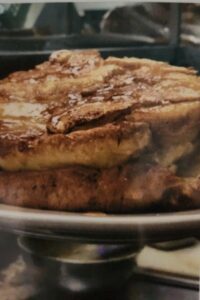
Close‑up of a thick, golden‑brown apple pancake stacked on a plate, with a glossy surface from syrup or melted butter, photographed in a warm kitchen setting.

So what’s your verdict?

Do you puff… or not puff? I love both versions. Sweet, filling comfort food either way. You be the judge.


Cranberries and Apples Oh My!

Cranberry Apple Season: A Holiday Feast

The holiday season is filled with more than twinkling lights and wrapped gifts—it’s filled with food! Oh yes, this time of year is a minefield for anyone watching their waistline or blood sugar. Turkey itself isn’t the culprit—it’s pure protein. Keep the gravy light, go easy on the mashed potatoes, and you’ll be fine. But beware: the snacks and sweets are lurking, ready to ambush you.


🍎 Apple season is in full swing.

At the grocery store, totes of apples are priced far lower than buying just a few loose ones. Of course, that means I walk out with three times more apples than I need. And what happens next? Baking. Pies, muffins, pancakes… all those sugar, fat, and carb-laden delights that taste so good but spell trouble for the waistline.

🥧 Apple pies—whether plain or the ooey-gooey skillet version—are irresistible.

Skillet Apple Pie – Fresh out of the oven

Mornings often begin with a Big Apple Pancake. Yum!

🍒 And then come the cranberries. If only I could resist! But fresh cranberries are only here for a few short weeks, and Massachusetts is the heart of cranberry country. So yes, I grab a bag… or two… or three. Get ready to boogie in the bog!

How do I love thee, fresh cranberries? Let me count the ways…

  1. Cranberry Christmas Cake
  2. Cranberry Sauce
  3. Cranberry Muffins
  4. Cranberry Breakfast Cake
  5. Cranapple Crumb Pie
  6. Christmas Cranberry Pound Cake
  7. Cranberry Nut Bread
  8. Sour Cream Cranberry Bread

And the list goes on. Honestly, I’m gaining pounds just writing this!

So let’s wrap it up before I raid the kitchen again. Keep an eye on Mom’s Recipe Corner at Welcoming Haven—I’ll be sharing these cranberry and apple creations as the season unfolds. And come January, you can join me at Weight Watchers to undo the damage. After all, Valentine’s Day is right around the corner… and I’ve got a fudge recipe waiting for you.

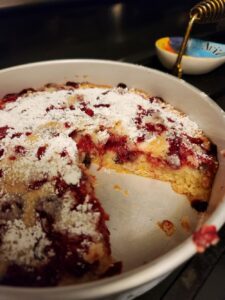
Cranberry Breakfast Cake- going fast!


From Orchard to Basket: Fun Facts About Apples

Fun Facts About Apple Picking Season 🍎🌳

Crisp air, golden leaves, and the crunch of fresh apples—it must be apple picking season! Visiting an orchard is more than just a fall tradition; it’s an adventure full of history, flavor, and fun. Whether you’re filling a basket with Honeycrisp, Gala, or Granny Smith, here are some juicy facts to make your apple-picking trip even sweeter.

Apples: Nutrition and Health Benefits

Stock Photo

1. Apples are ancient travelers.
Did you know apples have been cultivated for thousands of years? They originated in Central Asia, near Kazakhstan, and slowly spread across the globe thanks to traders and explorers. Today, they’re grown in more than 100 countries.

2. There are thousands of varieties.
While you might only see a few dozen at the orchard or grocery store, there are over 7,500 different apple varieties worldwide. Each one has its own flavor, texture, and best use—some are perfect for pies, while others are best for snacking.

3. The U.S. loves apples.
Apples are the second most consumed fruit in the United States, right after bananas. Washington state leads the way in production, but orchards across the country bring local charm to the harvest.

4. They float for a reason.
Ever wonder why apple bobbing works? Apples are about 25% air, which makes them buoyant enough to float in water. It’s science and fun all in one!

5. Picking your own is fresher.
When you pick an apple straight from the tree, it can last weeks longer than store-bought ones, since they haven’t traveled through storage and shipping. Plus, nothing beats that first juicy bite in the orchard.

6. Apples symbolize health and wisdom.
You’ve heard the saying, “An apple a day keeps the doctor away.” While not a magic cure, apples are full of fiber, vitamin C, and antioxidants, making them a smart seasonal snack.

Growing Delicious Apples at Home: From Planting to Harvest

Stock Photo

So, grab a basket, head to your local orchard, and celebrate apple picking season with a little extra knowledge. After all, fall is the perfect time to make memories—and maybe even a pie!

My Perfect Apple Pie - RecipeTin Eats

Stock photo

Easy Apple Pie

Amazing apple pies start with amazing pie crusts. Here’s one tried and true pie crust recipe to get you started

All-Butter Pie Crust

Amy Duska

An easy, all-butter pie crust recipe that gives you a tender, flaky pie crust every time! This recipe makes 2 pie crusts
Prep Time 15minutes 
Chill Time 1hour 
Servings 2 (9″) pie crusts

Ingredients

Instructions

  • Prepare the water/vinegar mixture. Drop an ice-cube into a measuring cup and fill the measuring cup up with water to the ½ cup mark. Add 2 teaspoons of white vinegar and set aside.
  • Mix Flour and Butter. Combine the flour, salt, and sugar together in a medium sized bowl and toss with a fork to mix evenly. Add the cubed butter to the bowl and use a pastry cutter to cut the butter into the flour until the mixture forms large, coarse crumbs.
  • Add Water. Pour the water mixture, a few tablespoons at a time, into the flour/butter mixture and toss with a fork until the dough is evenly moist. Add water slowly to get the right texture.
  • Gather the dough. Use your hands to quickly bring the dough together in the bowl. Do not over work the dough.
  • Divide and Chill. Divide the dough in half and flatten into disks. Wrap the disks separately in plastic wrap and chill in the refrigerator for at least 1 hour.
  • Bake according to what your pie recipe calls for.
All American Apple Pie

Stock Photo

The Pie Recipe

Amy Duska

This is hands down the BEST and easiest apple pie recipe! It has a tender, flaky, homemade pie crust with apple slices drenched in sugar and warm spices like cinnamon and nutmeg.
Prep Time 1hour 
Cook Time 1hour 
Servings 8

Ingredients

Instructions

    • Start by preparing this flaky pie crust recipe which makes 2 (9″) pie crusts, one for the bottom and one for the top of the pie. The pie dough will need to chill for at least 1 hour before rolling out. Or use a store-bought pie crust and follow package directions.
    • Place oven rack in the center position and Preheat the oven to 400°F (204°C).
    • In a large bowl, combine the sliced apples, granulated sugar, light brown sugar, flour, cinnamon, nutmeg, and lemon juice and lemon zest; toss to coat evenly.
  • Remove the pie crust dough from the fridge and let rest at room temperature for 5-10 minutes. On a lightly floured surface, roll one disc into a 12″ circle that is ⅛” thick. Carefully lay the crust into the bottom of a deep dish pie plate.
  • Spoon the apple filling over the bottom crust and discard juices at the bottom of the bowl. Roll out the second disc of pie crust until it is ⅛” thick and lay it over the apple filling.
  • Use a sharp knife to trim the dough along the outside edge of the pie plate. Lift the edges where the two pie crust meet, gently press to seal and fold them under. Rotate the pie plate and repeat this process until edges are neatly tucked under themselves. Cut 4 slits in the top of the dough to allow steam to vent. Place the pie on a baking sheet.
  • Brush the surface of the pie crust with the egg wash and sprinkle with sanding sugar. Cover the edges with a pie shield or a strip of foil to keep them from over browning during the first 25 minutes.
  • Bake at 400°F (204°C) for 25 minutes. Carefully remove the pie shield, turn the oven down to 375° and continue to bake for an additional 30-35 minutes or until the top is golden brown and the juices are bubbly. Cool at room temperature for at least 3 hours.


Old-Fashioned Apple Pie

Stock photo

Another Saturday Weigh In

It’s Weigh In day

It’s time for another Saturday weigh in. I bet you were all hoping I’d forget. Or maybe I’ve gotten sick of this weight loss stuff. Chalked it up to another failed attempt at the impossible but Noooo. I’m still plugging along. I’ll admit that this week was discouraging. I am faithfully logging my food. I’m weighing and measuring. I am making sure its healthy and low carb but my daily weigh in’s weren’t too promising. The scale and therefore my weight  has been up and down all week. Of course the only weigh in that counts is today.  Depending on what the scales tell me this morning I may have to cut out the fruit. I dropped grapes last week…too much sugar in them. That leaves apples. They have been  my go-to snack all week. I don’t think my body liked that. I figured it was better than candy but we’ll see. Here goes nothing!

Saturday Weigh in Results

Come on scale you are breaking my heart. Yesterday I was down another .4 lbs (Celebrate!) but this morning you’re back up .4 so in other words- No Change. Maybe it’s water weight. I ate fish yesterday and fish like the water right? Ok maybe that’s a stretch but this is really frustrating. Good Bye Apples. I’m going to have to give you up for now. Maybe I can bring you back next year. What can I put in for snacks to take the place of the apples? Maybe rice cakes? They worked before but they are all carbs. Dried fruit is all sugar. Ugh Got to think about this.

Next Week’s Weigh  in  is Canceled

Next Saturday you can feel safe to come by. No weigh in next week. I am going on vacation so I won’t have my scale to weigh in on. I firmly believe that weigh ins only count when they are done on the same scale.  Since I won’t be here to use my scale no weigh in will count even if I have access to another one somewhere else. Thanks for letting me vent. I’d go kick the scale but then I might break it or my toe and I don’t need to do either. 

No Change!