Bald Is Beautiful (But Not for Cat Furniture)

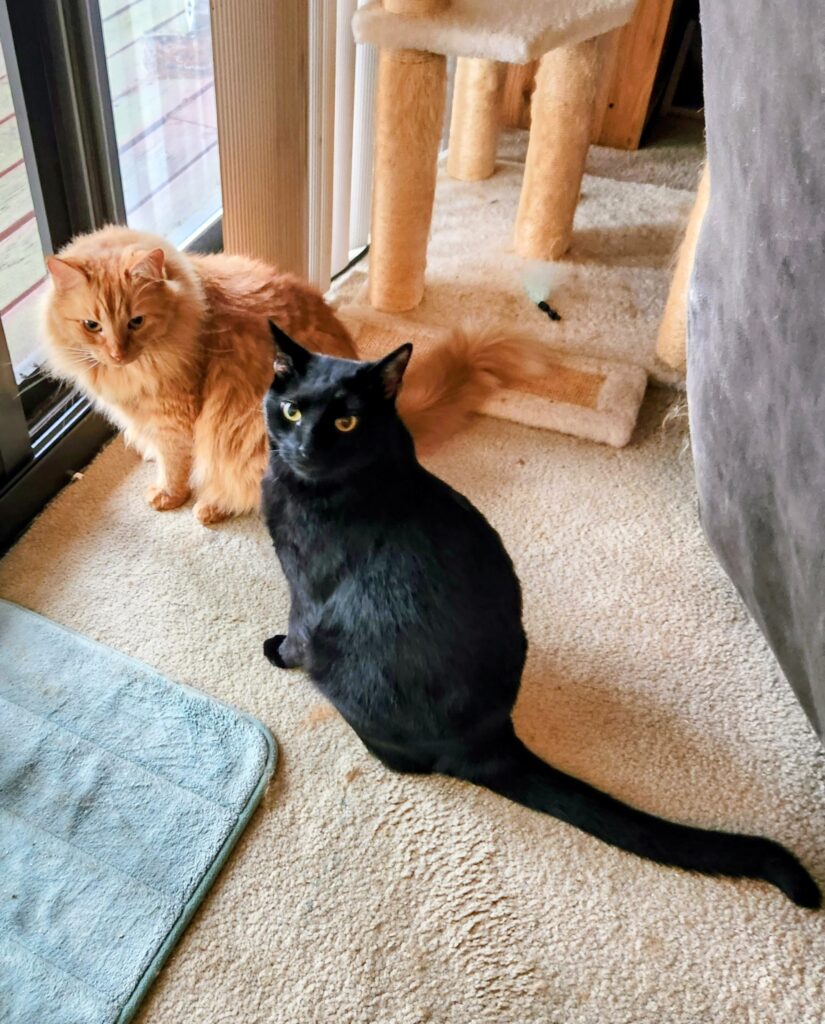
Banner and Balboa exploring the new cat tree 2023


🐾 The Balding Cat Tree Chronicles

When Inspiration Hits at the Worst Possible Time

There are days when I can’t think of a single blog idea, and then there are days like today — when I’m running late, haven’t even finished my coffee, and suddenly inspiration hits me right between the eyes.

The Shocking Discovery

I walked past the cat tree and froze.
Not because a cat was dangling off it like a circus performer.
Not because someone had knocked it over again.
No.
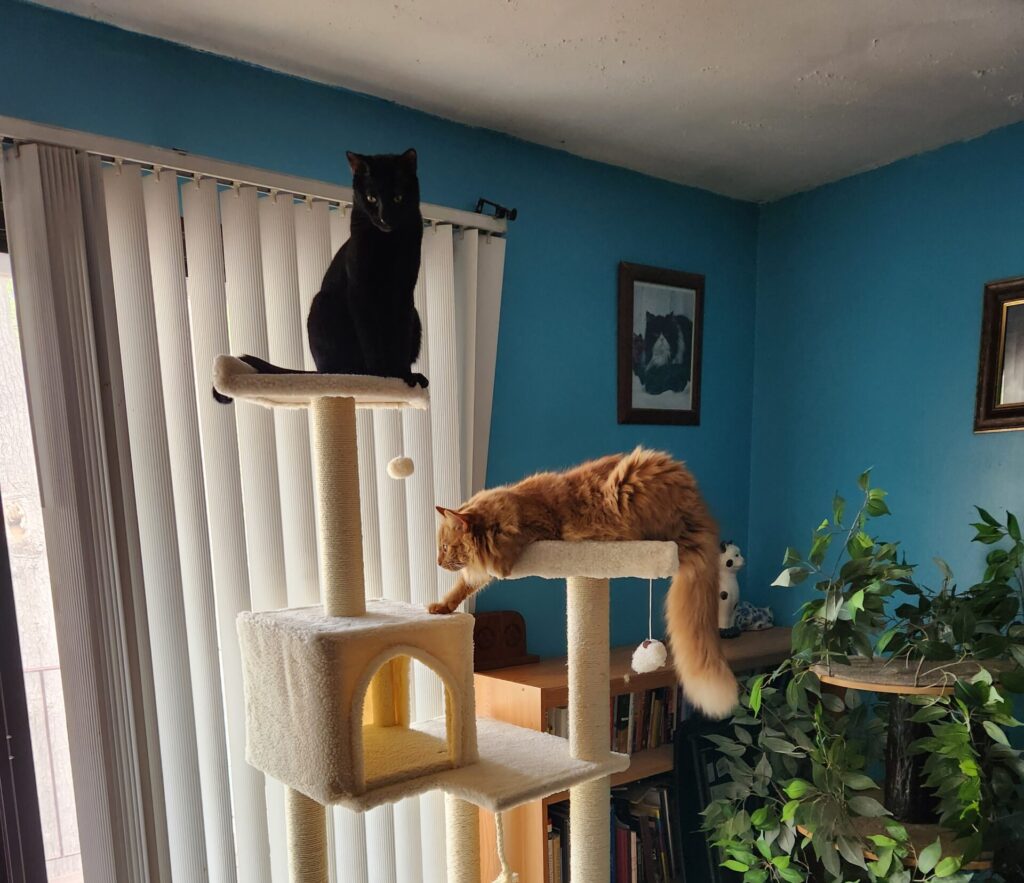
Because the thing is bald.


I’m talking down to the plywood, like a bar of hotel soap that’s been used by every guest since 1998. The once‑fluffy carpeting is now a memory, a suggestion, a rumor. If you squint, you can almost imagine what it used to look like.

Gratitude… Sort Of

Now, logically, I should be thrilled. If Banner and Balboa are scratching the cat tree, they’re not scratching my furniture. That’s a win. A victory. A tiny miracle. I should be doing a celebratory lap around the living room.

But here’s the thing:
Cat trees are not cheap.
And being on a fixed income means I can’t just stroll into PetSmart, point at the deluxe model, and say, ā€œWrap it up, boys.ā€

The GoFundMe That Will Never Be

So naturally, my brain — helpful as ever — whispered,
ā€œMaybe you should start a GoFundMe for a new cat tree.ā€
Don’t worry. I’m kidding.
(Probably.)

The Boys Take Credit

Meanwhile, Banner and Balboa are standing proudly beside their handiwork like tiny contractors who just completed a major renovation. If you ask them, the exposed wood is a design choice. Very modern. Very minimalist. Very ā€˜we did this on purpose, Mom.’

Balboa even sat on the top perch, surveying the room like a king on a throne made of splinters. Banner, of course, immediately tried to chew the corner, because why not add dental work to the list of future expenses.

Turning Chaos Into Content

So here I am, running late, staring at a cat tree that looks like it’s been through a war, and thinking, ā€œWell… at least it’s a blog post.ā€

And honestly? That’s the joy of living with cats. They destroy things, they cost money, they shed on everything you own — and somehow, they still give you something to laugh about on a Tuesday morning when you’re already behind schedule.

Stay tuned. The boys are already eyeing the curtains, so I’m sure Part Two is coming.


The Reverse Sear: A New Englander’s Indoor Steak Victory

Raw sirloin steak prepared for a reverse‑sear recipe, shown with garlic on parchment.

Life Before the Condo Rules

New Englanders are a hearty lot. Around here, there’s no such thing as ā€œGrilling Season.ā€ We grill in snowstorms, nor’easters, and the occasional blizzard just to feel alive. I was no different. I cooked everything on my Weber — steaks, turkeys, potatoes, corn, kabobs, chicken, fish. Honestly, I used my grill more than my stove.

Then I bought my condo.

It has a lovely west‑facing deck, and I pictured myself out there year‑round, happily grilling under shelter like a civilized cavewoman. What I didn’t picture was the fire code. Not only could I not grill on the deck, I couldn’t even store a grill there. The only allowed option was an electric grill and… well… if I’m going to cook on a glorified space heater, I might as well use my stove.

So began my quest: how do you cook a steak indoors that still satisfies the primal red‑meat urge?


My Cast Iron Era: The Classic Pan Sear

For years, my go‑to method was the classic pan sear in my beloved cast iron skillet. If you’ve never done it, here’s the quick version:

How a Traditional Pan Sear Works

  • Heat a cast iron skillet until it’s smoking hot.
  • While it heats, coat your steak lightly in vegetable oil, salt, and pepper.
  • Lay the steak in the pan — you’ll get that glorious sizzle and a puff of smoke that could set off every alarm in the building.
  • Sear for a couple of minutes on the first side to build a crust, then flip and repeat.
  • Remove from heat and let it rest while you prep your sides.

It’s fast, it’s flavorful, and it gives a great crust. But it also fills the kitchen with smoke, and the inside of the steak can go from rare to overcooked in a heartbeat.

Lately, I wanted something better — something more steakhouse‑level without steakhouse prices.

And that’s when I found it.


Enter: The Reverse Sear

I’m only one person, and after years of dieting, I can’t eat a whole steak in one sitting. So when Hannaford’s had one of their rare steak sales, I grabbed a nice sirloin for $13. It was small, so I got three good cuts out of it — just $4.33 per meal. That’s a win.

Now I just needed the perfect cooking method.

Reverse sear won by a landslide. Tender, evenly cooked, beautifully crusted — every time. I’m hooked.

Here’s how to do it.


How to Reverse Sear a Steak (No Grill Required)

Step 1: Prep Your Steak

  • Start with a thick cut — at least 1.5 inches.
  • Pat it completely dry.
  • Season generously with kosher salt and pepper.
  • Add garlic powder or any spices you love.
  • Place on a wire rack (I use my air fryer basket).

Step 2: Slow Cook

  • Preheat your oven to 250°–275°F.
  • Place the steak on the rack over a baking sheet.
  • Bake for 30–50 minutes, until the internal temp reaches 115°F for rare.
    • My smaller steaks usually hit this around the 30‑minute mark.

Step 3: High‑Heat Sear

  • Heat your cast iron skillet over high heat until it just starts to smoke.
  • Add a high‑smoke‑point oil (canola, vegetable, avocado).
  • Sear the steak 60–90 seconds per side until a deep brown crust forms.

Step 4: Rest and Serve

Because the steak cooked low and slow, it barely needs resting. A minute or two is plenty.


Notes & Tips

  • Many recipes suggest salting the steak and leaving it uncovered in the fridge for up to 24 hours. I haven’t tried it, but it’s supposed to improve the crust. If you test it, report back.
  • If you don’t mind smoke, add a pat of butter during the sear for extra flavor — just know it will burn.
  • A probe thermometer is essential to avoid overcooking before the sear.
  • A dry, heavy skillet (cast iron is best) gives the best crust. Make sure it’s screaming hot.
  • Add aromatics (butter, garlic, herbs) during the last minute of the sear and baste for extra flavor.

Regular Sear vs. Reverse Sear

You be the judge. I know which one I prefer — and I’d love to hear which method wins in your kitchen.


THE FURRY AND THE RESTLESS

In a world where cardboard boxes hold power, alliances shift like sunbeams, and brothers battle for territory, a new saga emerges. Premiering today on Cat TV: The Furry and the Restless. The pilot episode is already causing a stir in living rooms everywhere — and you, dear reader, get the first look.

Balboa’s beloved cardboard retreat, the emotional support box whose invasion sparked the dramatic events of this episode of The Furry and the Restless.

The cardboard box Balboa claims as his personal fortress — the scene of the great kitty soap‑opera showdown.


⭐ THE SCRIPT — THE FURRY AND THE RESTLESS: Episode 1 — The Box Betrayal

[Opening Narration]
In a quiet condo in Taunton, two brothers navigate love, betrayal, and the fragile politics of shared cardboard real estate. This… is The Furry and the Restless.


Scene 1: The Living Room — Early Afternoon

Balboa lounges regally on Deborah’s lap, purring like a villain plotting something tender.

Balboa (internal monologue):
ā€œAt last… peace. My sanctuary awaits. It’s my box and my fortress. My emotional support cardboard. Soon I shall retire to it and contemplate my greatness.ā€

Banner wanders in with the energy of someone who has never once considered consequences.

Banner:
ā€œOh look. A box.ā€

He steps in. He settles. The paper crinkles.


Balboa (eyes widening):
ā€œā€¦No. No. NO.ā€


Scene 2: The Betrayal

Balboa launches off Deborah’s lap like a furry missile fired from a catapult.

Balboa:
ā€œABSOLUTELY NOT! THAT IS MY SANCTUARY!ā€

Deborah (caught in the crossfire):
ā€œBALBOA—! OH FOR THE LOVE OFā€”ā€

Banner (blinking slowly):
ā€œā€¦What?ā€

Chaos erupts. A dramatic zoom‑in on Balboa’s betrayed face.


Scene 3: The Confrontation

Balboa circles the box like a panther circling a rival king.

Balboa:
ā€œYou dare enter my cardboard kingdom? My sacred retreat? My PAPER‑LINED HAVEN?ā€

Banner:
ā€œI just… sat down.ā€

Balboa:
ā€œYou have violated the Treaty of Cardboardia!ā€

Banner:
ā€œI didn’t know there was a treaty.ā€

Balboa:
ā€œThere is NOW.ā€


Scene 4: Deborah Attempts Peace Talks

Deborah stands between them like a weary UN diplomat.

Deborah:
ā€œGentlemen. Please. It’s a box.ā€

Balboa:
ā€œA BOX OF GREAT EMOTIONAL SIGNIFICANCE.ā€

Banner:
ā€œā€¦It’s comfy.ā€

Deborah:
ā€œBanner, honey, maybe try the OTHER box?ā€

Banner:
ā€œThere’s another box?ā€

Balboa:
ā€œNOT THAT ONE EITHER.ā€


Scene 5: The Aftermath

Balboa retreats to the top of the cat tree, glaring down like a dethroned monarch plotting revenge.

Balboa (dramatically):
ā€œI have been wronged. I shall scream at 3 PM to express my suffering.ā€

Banner (already napping):
ā€œOkay.ā€

My Box

Deborah (sighing):
ā€œAnd so it beginsā€¦ā€


End of Episode 1

Next time on The Furry and the Restless:
Will Balboa reclaim his cardboard throne?
Will Banner accidentally start another war?
Will Deborah ever get through a day without feline drama?

Stay tuned.


What’s For Breakfast?

Crispy bacon and sunny side up eggs, it's what's for breakfast

šŸŒ… When Breakfast Stops Behaving

I used to love breakfast. It was my favorite meal of the day — easy, low‑mess, and full of the good stuff: bacon, sausage, eggs… or muffins and pancakes if I was feeling decadent.

But lately? Breakfast just hasn’t been sitting well, and I’m not sure why. My usual rotation is simple: a basic omelet with bacon or sausage, or two poached eggs on toast with (again) bacon or sausage. Suddenly none of it appeals.

🧁 The Muffin Era

So I pivoted to muffins. Bran muffins, cinnamon muffins, mini donut muffins, even chocolate chip muffins. Fruit muffins are next — blueberry or apple, most likely.

I’ve shared plenty of quick breads too, but even those aren’t calling my name.

And then there are the cruffins. Quick, fun, small‑batch friendly… but nope. Not in the mood for those either.

šŸ§‡ Waffles? Not Today

I don’t have a waffle iron, and I’m not fond of frozen waffles. They’re thin, frosty, and somehow manage to burn on one corner while staying damp on the other. Hard pass.

šŸ„ž Pancakes to the Rescue

So I finally settled on pancakes. I haven’t made them in a while. I usually have a box mix around somewhere, but I think it may have gone out the door during the Great Pantry Purge.

No problem — pancake mix is easy to whip together and keeps beautifully in an airtight container. Here’s my basic mix in case you get a craving and don’t have a box handy.


šŸ„ž Basic Homemade Pancake Mix (No Box Needed)

Dry Mix

Whisk together and store in a jar, or make it fresh each time:

  • 1 cup all‑purpose flour
  • 2 tablespoons sugar
  • 2 teaspoons baking powder
  • ¼ teaspoon salt

To Make Pancakes From the Mix

Add:

  • 1 cup dry mix
  • 1 cup milk
  • 1 egg
  • 2 tablespoons melted butter or oil
  • Optional: ½ teaspoon vanilla

Stir until just combined — a few lumps are good. Cook on a lightly greased skillet over medium heat until bubbles form, flip, and finish cooking.

Hot and fluffy pamcakes swimming in butter and maple syrup to start the day


🐾 Banner, the Uninvited Sous‑Chef

Banner was sitting on the grill offering to ā€œhelp.ā€ Since I didn’t feel like a battle with him this morning, I pulled out my electric fry pan instead. While I mixed up the batter, I added just enough oil to coat the bottom, and right before pouring the batter, I swiped the surface with butter — a little treat I don’t usually bother with.

I had room for three small pancakes, and they started to sizzle immediately. The butter gave them a crispy, browned edge, and the controlled heat gave them a lovely rise. Not a bad way to start the day.


🄣 Bonus: Big‑Batch Pantry Mix

If you like having your own homemade pancake mix ready to scoop and go, here’s a larger batch you can keep in a jar.

šŸ„ž Big‑Batch Homemade Pancake Mix

Makes about 7–8 cups of dry mix (enough for ~6–7 breakfasts)

Dry Mix (store in a large jar or canister):

  • 6 cups all‑purpose flour
  • 12 tablespoons sugar (¾ cup)
  • 6 tablespoons baking powder
  • 1 tablespoon + 1 teaspoon salt

Whisk thoroughly so the baking powder is evenly distributed. Store airtight.

To Make Pancakes From the Big Batch

For 1 batch (about 8 pancakes):

  • 1 cup pancake mix
  • 1 cup milk
  • 1 egg
  • 2 tablespoons melted butter or oil
  • Optional: ½ teaspoon vanilla

Mix gently, cook on medium heat, flip when bubbly.

Notes from Dusty’s Test Kitchen

  • Fits perfectly in a standard half‑gallon jar or tall canister.
  • Shake or stir before scooping if it’s been sitting.
  • Double it if you want a ā€œseasonal prepperā€ stash — keeps 2–3 months in the pantry, 6+ months in the freezer.
  • Add cinnamon or nutmeg to the dry mix for a cozy version.

šŸ“ A Sweet Finish

Now you’re all set to make pancakes whenever the mood strikes. This time of year, a dollop of rhubarb sauce instead of maple syrup gives them a sweet‑tart punch.

Enjoy.


Photo gifts for Dad from giftlab

Father’s Day from GiftLab

Father’s Day is June 21 and we all know Father’s are tough to buy gifts for. You’re not planning to give Dad another tie are you? I’m sureĀ  you’ve been wracking your brain for gift ideas.Ā  Well, I have a tip and there’s plenty of time to order. Why not give a gift that Dad will cherish for years…a photo gift from Giftlab. Check out the Father’s Day Line up at Gift Lab.Ā Ā 

Giftlab has great ideas for  Dad's gift this year. Why not give something unique instaed of another tie

This post contains affliate links. If you make a purchase through them, I may earn a small commission at no extra cost to you. Thank you for supporting Around Dusty Roads.