Frog Eye Salad
 When a Name Makes You Pause
How much are you influenced by the name of a food. Have you ever looked at a menu and thought, oh that sounds good — or just as quickly said, absolutely not. Would you try something that sounds, well… disgusting.
Recently one of the food bloggers I follow sent out a recipe for Frog Eye Salad. Yup. Frog eyes. It instantly made me think of a witch’s brew. All it needed was a little eye of newt or maybe a bat wing to round it out. Now, if they said frog legs, I could get behind that. After all, we eat chicken wings and legs, turkey legs, and even chicken feet. Why not frog legs. But frog eyes. I draw the line.
Fancy Names for Questionable Things
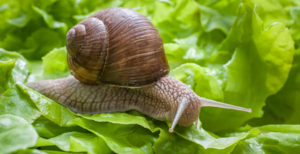
And while we’re talking about things that sound questionable, let’s consider eggs. We cook with chicken eggs every day, but I won’t even consider caviar. It doesn’t sound bad, but it’s fish eggs. I can’t. I just can’t. Meanwhile, I do like escargot — especially with garlic, butter, and cheese. Leave it to the French to make a tasty dish out of something slimy, but at least they gave it a cool name. Escargot is much easier to swallow than snails.
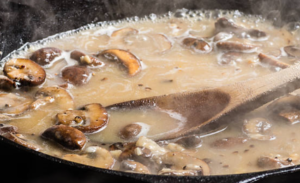
Moving on, let’s consider foie gras. Another French concoction. It sounds exotic and high‑brow. How do the French do that? It’s just a fancy name for goose liver. Goose liver pâté. Slap it on a cracker and voilà — a tasty appetizer. Ummm… no thank you.
Halloween Foods Are Just Drama Queens
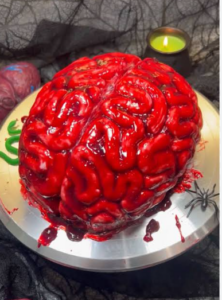
Bloody Brains for Halloween
Now, if you’re preparing a Halloween feast, you might reconsider that Frog Eye Salad. Remember what started this whole train of thought. Halloween foods are basically regular dishes with dramatic names. A plate of “bloody brains” is just spaghetti with red sauce or a strawberry Jell‑O mold. “Monster eyeballs” can be mozzarella balls with an olive slice. And no one can skip “spider eggs” for a total gross‑out — deviled eggs topped with olive slices arranged like spider legs.
But back to the Frog Eye Salad. Is it a real thing? Yes. Yes it is. And based on the ingredient list, I think it might even be edible. No bat wings required. Not even any frog eyes.
Frog Eye Salad
A sweet, chilled holiday dessert made with acini di pepe pasta, coconut, pineapple, mandarin oranges, and marshmallows.
Prep Time: 15 mins Cook Time: 20 mins Additional Time: 9 hrs Total Time: 9 hrs 35 mins Servings: 10
Ingredients
- 1 ¾ cups unsweetened pineapple juice
- 1 cup white sugar

- 2 large eggs, beaten
- 2 tablespoons all-purpose flour
- 2 ½ teaspoons salt, divided
- 1 tablespoon lemon juice
- 1 tablespoon vegetable oil
- 1 (16 ounce) package acini di pepe pasta *
- 3 (11 ounce) cans mandarin oranges, drained
- 2 (20 ounce) cans pineapple tidbits, drained
- 1 (20 ounce) can crushed pineapple, drained
- 1 (8 ounce) container frozen whipped topping, thawed
- 1 cup miniature marshmallows
- 1 cup shredded coconut
Directions
- Combine pineapple juice, sugar, eggs, flour, and ½ teaspoon salt in a saucepan. Cook over medium heat until thickened.
- Remove from heat; stir in lemon juice. Cool to room temperature, about 1 hour.
- Bring a large pot of water to a boil; add oil and remaining salt. Cook pasta until al dente, 5–7 minutes. Drain and rinse under cold water.
- Combine pasta, cooled egg mixture, oranges, pineapple tidbits, crushed pineapple, and whipped topping in a large bowl. Refrigerate 8 hours or overnight.
- Before serving, add marshmallows and coconut; toss and serve.
*Note: In case you didn’t know (I didn’t) acini di pepe pasta is a very small, round pasta (about 0.2–0.3 cm). It’s Tender but slightly chewy when cooked al dente.

Let me know if you make it. I’m still struggling with the name.
And while I’m thinking about it, there are plenty of less‑than‑appetizing food names out there. Ants on a log comes to mind — and it’s actually a favorite of mine, though I’d never call it that. To me, it’s peanut butter on celery. Then we can head to England and enjoy Toad in the Hole (sausages baked in batter), same family as our pigs in a blanket. And while you’re there, would you like a dish of Spotted Dick.

There are a bunch more. What’s your favorite gross‑sounding food or meal. Or what’s something you’d never try just because the name is off‑putting. Bring it on. Inquiring minds want to know.


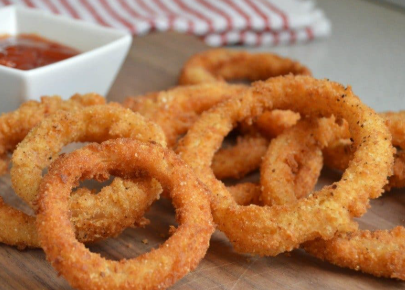
 Onion Rings & Other Adventures

 Directions
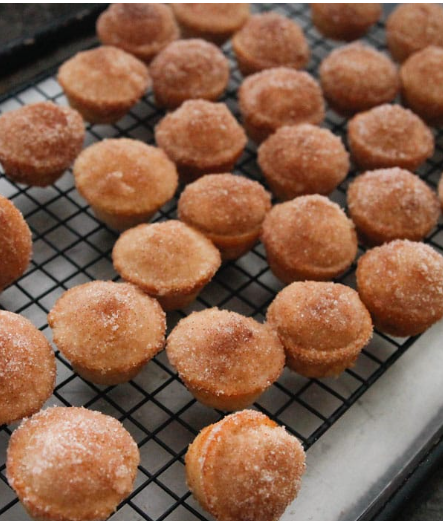
 The Universe Sends a Sign