WOW! Over 2,100 Posts — No Wonder I Can’t Find Anything
 I’ve got over 2,100 published posts on Around Dusty Roads. I’ve either had a lot to say… or I just really love the written word. Probably a little of both.
Just like my photo library, it’s overwhelming — but at least all of my posts are tagged, so eventually I can track down what I’m looking for.
And yes, I finally found the post I needed: Chocolate Chip Banana Bread.
Which brings me to the real reason for this post.
Eating Well When You’re Cash‑Strapped
My hairdresser was telling me about a friend of hers who’s in the same boat I am: Social Security doesn’t stretch to the end of the month.
The big difference?
I cook.
Her friend orders takeout.
I’ve had to make a lot of adjustments since retirement. I’ve tried finding a second income stream —![]() DoorDash, Amazon affiliate marketing, even applying for “real jobs” (my ego has taken a beating there; most resumes disappear into the void). And of course, there was Welcoming Haven, my online store — my great hope that fizzled. So it’s not like I’ve been sitting around.
DoorDash, Amazon affiliate marketing, even applying for “real jobs” (my ego has taken a beating there; most resumes disappear into the void). And of course, there was Welcoming Haven, my online store — my great hope that fizzled. So it’s not like I’ve been sitting around.
Even on a fixed income — and especially now that my Social Security check is only about one‑third of what I earned when I was working — you can still enjoy good meals.
The Secret: A Well‑Stocked Pantry
A stocked pantry is your best friend when money is tight. I always keep:
- Canned tomatoes
- Canned soups
- Tuna
- Flour, sugar, and baking staples
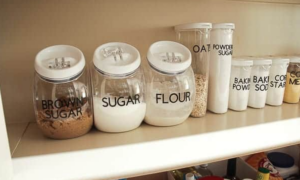
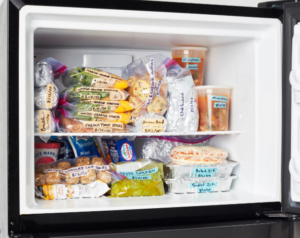
And the freezer? That’s where the real savings happen. I pick up meats, fish, and poultry only when they’re on sale and stash them away.
Let’s Talk Baking (The Easy Kind)
 I’m not talking about artisan sourdough or anything that needs a starter. I mean the little things — quick breads.
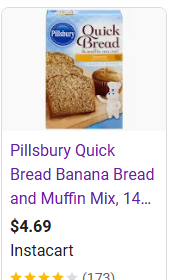
Back when I was flush, I’d toss a couple of boxed mixes into the cart without thinking. But on my last shopping trip, I nearly choked:
$4.69 for ONE box.
And for what?
Someone else measuring your dry ingredients?
What Is a Quick Bread, Anyway?
I used to think “quick bread” just meant you could add an egg and some milk and pop it in the oven quickly.
But here’s the real definition:
A quick bread is a bread leavened with baking powder or baking soda instead of yeast. Because the rise comes from a chemical reaction rather than fermentation, the batter can be baked immediately, with no proofing time.
Once I understood that, I realized I could absolutely make these from scratch.
Why I Started Baking My Own
I’ve always doctored boxed cranberry bread by adding fresh cranberries — the mix alone is too bland. So why not skip the box entirely?
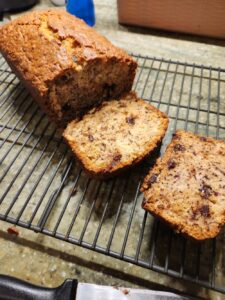
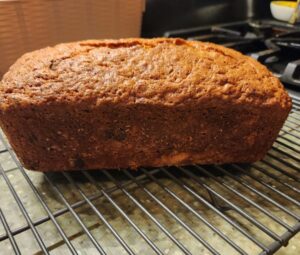
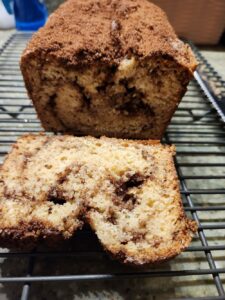
That’s how I ended up experimenting with homemade versions. And today’s recipe is my newest attempt: Cinnamon Swirl Quick Bread.
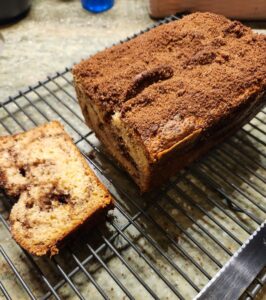
The swirl still needs practice, and next time I may turn the topping into more of a streusel by adding butter for a crumbly texture. But here’s the basic recipe as written — no tweaks, just simple and straightforward.
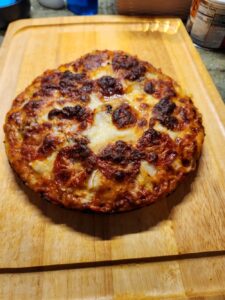
Cinnamon Swirl Quick Bread
Ingredients
Batter
- 1 cup granulated sugar
- 2 large eggs (room temperature)
- ½ cup sour cream (room temperature)
- ½ cup milk
- ⅓ cup vegetable oil
- 2 teaspoons pure vanilla extract
- 2 teaspoons baking powder
- 1 teaspoon baking soda
- ½ teaspoon salt
- 1 ½ cups all‑purpose flour
Cinnamon Sugar
- ½ cup brown sugar
- 1 tablespoon ground cinnamon
Instructions
- Preheat oven to 350°F. Line a 9×5 loaf pan with parchment or spray with baking spray.
- In a large bowl, whisk together sugar, eggs, sour cream, milk, oil, and vanilla.
- Add flour, baking powder, baking soda, and salt. Stir until just combined.
- In a small bowl, mix the brown sugar and cinnamon.
- Pour half the batter into the loaf pan. Sprinkle ¾ of the cinnamon sugar evenly over the batter. Swirl gently with a butter knife.
- Add the remaining batter, then sprinkle with the remaining cinnamon sugar.
- Bake 50–65 minutes, or until a skewer inserted in the center comes out clean.
Notes
- The cinnamon sugar mixture tends to float, so don’t be too gentle or you won’t get a good swirl.
- If the top browns too quickly, loosely tent with foil for the last 30 minutes.
- Greek yogurt can be substituted for sour cream.
Final Thoughts
I hope you give baking without the box a try. Taste tests prove it’s just as good — sometimes even better — when you make it yourself.


 eye. It was noticeably pricier than the plain roll — especially if you weren’t splurging on Heavy Duty — but curiosity won. One roll later, I was a convert. Some chefs swear by the non‑stick variety exclusively, and honestly, I get it. It’s a little luxury that solves a lot of kitchen annoyances.
 The shiny/dull thing isn’t a design choice — it’s a manufacturing quirk. And because I can’t resist channeling the popular TV show


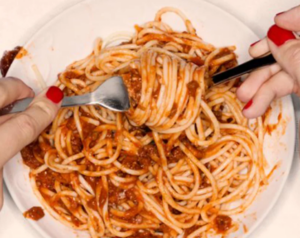
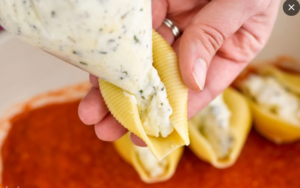 Recently I had some ricotta left over and wanted to try my hand at stuffed shells, but believe it or not, I couldn’t find any big shells to stuff. And if you think I’m going to stand there trying to fill those tiny little shells, you are so wrong. Crazy I’m not — only slightly demented.
 hamburger.
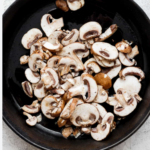 moisture, sauté them first. A tablespoon of oil, a sprinkle of garlic powder, and 5–7 minutes over medium heat will give you perfect, flavorful mushrooms.
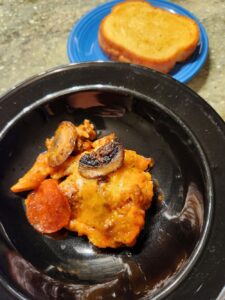

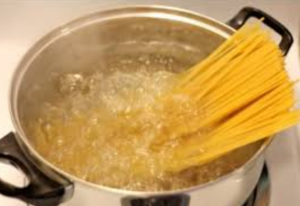
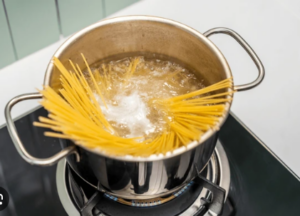 of boiling water… and left the top half sticking straight out like a pasta bouquet. As the bottom softened, the noodles slowly slid into the pot on their own, as if obeying some ancient culinary law.
 This one comes straight from Italian culinary tradition. In Italy, pasta shapes are treated with the same respect we give to Thanksgiving turkey or Grandma’s cast‑iron skillet. Long pasta is meant to stay long because: