Or, How I Learned I’m Officially One of the “Old People”
 Ok, I admit it. I’ve crossed over. I am now officially one of the “elderly,” and as one of the Old People, I tend to be a little forgetful. But I still make lists — real lists — written on actual paper with a pen or pencil. I use my phone for plenty of things, but grocery lists are sacred. I want the satisfaction of crossing things off as they go into the cart. It’s a ritual.
So last Tuesday I headed to Hannaford for my weekly grocery run. Back in the day I’d pop in whenever I needed something, but now I try to do it all in one trip. Why Tuesday? Because Tuesday is Senior Discount Day, and I am absolutely here for saving a few pennies.
Right there on my list, bold as can be: flour.
My mother always bought the giant bag, but since it’s just me, I stick to the small ones. Easier to store, less likely to go stale, and it forces me to keep an eye on how much is left. Well… it finally happened. Hannaford only had the big bags, so I skipped it. I wasn’t planning any baking anyway. What could go wrong?
Oops.
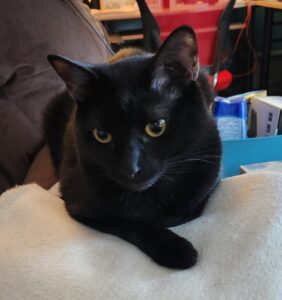
Fast‑forward to dinner. After all the pork‑chop experimenting I’ve been doing, I wanted something sweet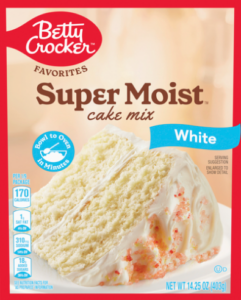 to finish the meal. I had a cat on my lap, so I figured the urge to bake would pass. But no. An hour later, I still wanted cupcakes.
I remembered I had a box of white cake mix in the cupboard. Easy peasy. Except… the “Best By” date was 8/20/2020. Not months old. Years. I’ll use things past their date, but even I have limits. That mix was basically an archaeological artifact.
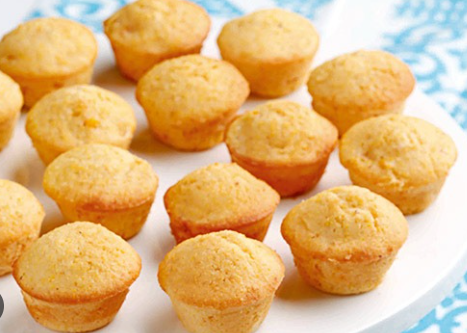
Fine. I’d make cupcakes from scratch. Mini ones, so I wouldn’t overindulge. I pulled out my favorite yellow cake recipe — it’s so good.
Who needs a box anyway!
Soft Buttery Yellow Cake (Perfect for Mini Cupcakes)
Ingredients
- 1 ¼ cups all‑purpose flour
- 1 cup granulated sugar
- ½ cup unsalted butter, softened
- 2 large eggs
- ½ cup whole milk
- 1 ½ teaspoons baking powder
- ½ teaspoon vanilla extract
- ¼ teaspoon salt
Instructions
- Preheat oven to 350°F and line your mini muffin pan.
- Cream butter and sugar until light and fluffy.
- Add eggs one at a time, mixing well.
- Stir in vanilla.
- In a separate bowl, whisk flour, baking powder, and salt.
- Add dry ingredients alternately with milk, mixing just until combined.
- Fill mini cups about ⅔ full.
- Bake 10–12 minutes or until tops spring back.
- Cool completely before frosting.
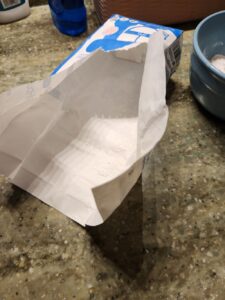
As I gathered ingredients, I noticed the flour bag felt suspiciously light. A quick check confirmed I had just under one cup left. But by then I was committed. I wanted cupcakes. I was emotionally invested.
So I did some questionable math, cut the recipe in half, and created:
Half‑Batch Yellow Cake (Perfect for 18 Mini Cupcakes)
Ingredients
- ⅔ cup all‑purpose flour
- ½ cup granulated sugar
- ¼ cup unsalted butter, softened
- 1 large egg
- ¼ cup + 2 tablespoons whole milk
- ¾ teaspoon baking powder
- ¼ teaspoon vanilla extract
- Pinch of salt
Instructions
- Preheat oven to 350°F.
- Cream butter and sugar until fluffy.
- Add egg and vanilla; mix well.
- Whisk flour, baking powder, and salt in a separate bowl.
- Add dry ingredients alternately with milk.
- Fill mini muffin cups ⅔ full.
- Bake 10–11 minutes.
- Cool before frosting.
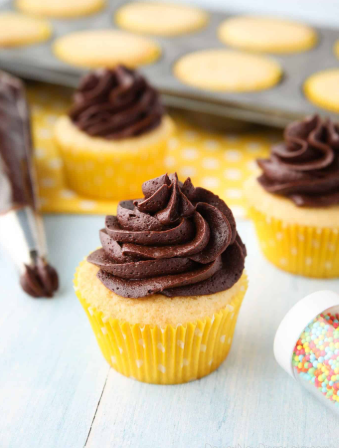
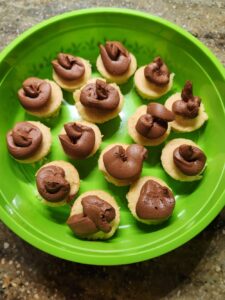
These bite‑sized morsels are a treasure for your taste buds. Honestly, you don’t even need frosting — but if you decide to go all in, that’s when the real adventure begins. Now came the frosting. Have you tried frosting mini cupcakes lately? I’m fine with full‑size cakes, but minis usually end with frosting all over my thumbs, the counter, and sometimes the cat.
So I tried piping it on. I didn’t have any tips, so I cut the corner off a plastic bag and hoped for the best.
Here they are — not the prettiest, but absolutely delicious. Maybe even better because of all the drama.
My Favorite Chocolate Frosting (Buttercream Style)
Ingredients
- ½ cup unsalted butter, softened
- 2 ½ cups powdered sugar
- ¼ cup cocoa powder
- 2–3 tablespoons milk
- ½ teaspoon vanilla extract
- Pinch of salt
Instructions
- Beat butter until creamy.
- Add powdered sugar and cocoa gradually.
- Add milk a tablespoon at a time until smooth and spreadable.
- Mix in vanilla and salt.
- Pipe or spread onto cooled cupcakes.
Enjoy!
And remember: sometimes the best desserts come from a little chaos, a little improvising, and a cat who refuses to move from your lap.