 🔥 Wok This Way: Cast Iron vs. Electric for Stir-Fry Bliss
When it comes to sizzling stir-fries and bold flavor, the right wok makes all the difference. Whether you’re craving smoky seared veggies or a quick weeknight dinner, we’ve got two standout options to elevate your kitchen game.
🧱 Cast Iron Wok: Tradition Meets Power

Our cast iron wok is a culinary classic. With its heavyweight build and excellent heat retention, it’s perfect for high-temperature cooking and that coveted wok hei—the smoky essence that defines great stir-fry. It’s pre-seasoned for a natural nonstick surface and deep enough for tossing noodles, veggies, or even popcorn shrimp.
- Ideal for gas or induction stovetops
- Naturally nonstick with proper care
- Adds iron to your diet
- Built to last generations
⚡ Electric Wok: Convenience with a Sizzle
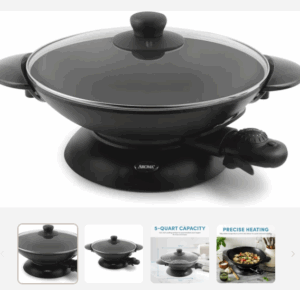
Prefer plug-and-play simplicity? Our electric wok heats evenly and quickly, making it a go-to for busy cooks. With adjustable temperature control and a nonstick interior, it’s perfect for dorms, small kitchens, or anyone who wants stir-fry without the stovetop fuss.
- Heats up fast with consistent results
- Easy to clean and store
- Great for sautéing, steaming, or simmering
- Perfect for beginners
🥢 Quick Veggie Stir-Fry Recipe
Here’s a simple, flavor-packed stir-fry to test-drive your new wok: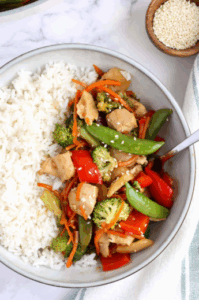
Ingredients
- 2 tbsp sesame oil
- 1 clove garlic, minced
- 1 cup broccoli florets
- 1 red bell pepper, sliced
- 1 cup snap peas
- 2 tbsp soy sauce
- 1 tsp honey or maple syrup
- Optional: tofu or chicken strips
Instructions
- Heat oil in your wok until shimmering.
- Add garlic and stir for 30 seconds.
- Toss in veggies and stir-fry for 3–5 minutes.
- Add soy sauce and sweetener, stir to coat.
- Serve hot over rice or noodles.
Flavor Starts Here—Discover Your Dream Wok Here
This post contains affiliate links. If you purchase through them, I may earn a small commission—at no extra cost to you. Thank you for supporting Arounddustyroads and WelcomingHaven!


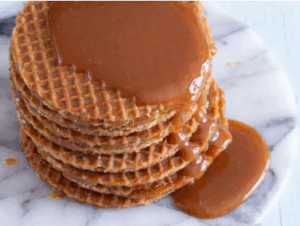 A stroopwafel (pronounced stroop-waa-fuhl) is a Dutch treat that’s as fun to say as it is to eat. It’s made of two thin, crisp waffle cookies pressed together with a gooey caramel syrup filling. The name literally means “syrup waffle” in Dutch, and it’s traditionally enjoyed perched atop a steaming cup of coffee or tea—softening the center and releasing its cinnamon-scented magic.
:max_bytes(150000):strip_icc():format(webp)/8941-slow-cooker-chicken-and-dumplings-DDMFS-4x3-0be0b1895efe4983acfc38ad3acc0fa2.jpg "Chicken and Dumplings its Not!")


