Iron Skillet Meatloaf

stock photo

Cast Iron Meatloaf: A Cozy Classic from My Kitchen

Yesterday I teased my Cast Iron Meatloaf in the Skillet Lasagna post—so naturally, I had to follow through and share the recipe! If you love hearty comfort food with a rustic twist, this one’s for you.

🍽 The Easy-Peasy Meatloaf

Back in 2023, I shared my go-to meatloaf recipe—simple, satisfying, and perfect for busy nights. If you missed it, [here’s the link to that post]. It’s still a favorite, especially when I want something quick and cozy.

But then I discovered the Iron Skillet version… and I was hooked.

stock photo

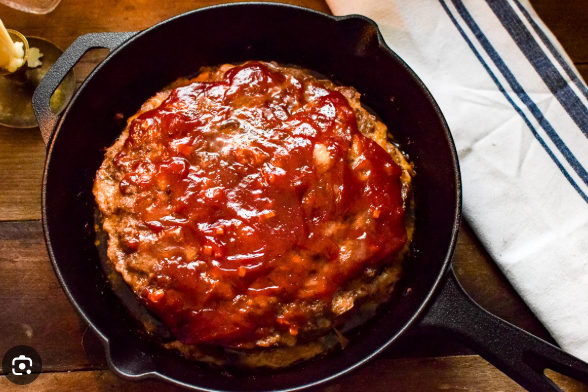
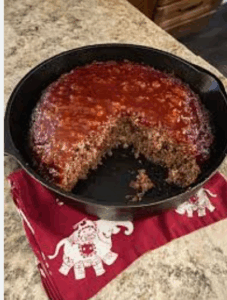
🔥 Iron Skillet Meatloaf

This recipe is just as easy, but the cast iron skillet adds a depth of flavor and a beautiful crust. It originally called for bacon on top (because, well, bacon), but my oven didn’t crisp it quite right—so I usually skip it. Feel free to experiment!

Ingredients:

  • 1½ lbs. ground beef
  • 1 lb. roll breakfast sausage (optional)
  • ½ green bell pepper, chopped
  • ½ medium onion, diced
  • 1 small can tomato sauce
  • 1 large egg
  • ½ sleeve saltine crackers (or stovetop stuffing—see Easy-Peasy recipe)
  • ¼ tsp. each salt and pepper
  • Ketchup, for topping
  • 4 slices bacon (optional)

Directions:

  1. Preheat oven to 350°F.
  2. In a large bowl, combine the first eight ingredients.
  3. Line your cast iron skillet with foil for easy cleanup, then press the mixture into a 2-inch deep round.
  4. Top with a generous swirl of ketchup—and bacon, if using.
  5. Bake for 1 hour, uncovered.

The tomato sauce keeps it moist, and the skillet gives it that golden edge. It’s rustic, flavorful, and perfect with mashed potatoes or roasted veggies.

_______________________________________________________________

Amazon photo

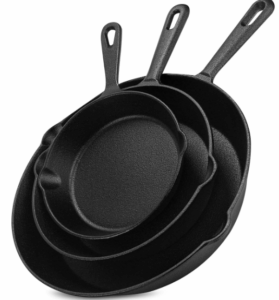
Cast iron skillets aren’t just for pros—they’re for anyone who loves flavor, texture, and timeless cookware. I use mine weekly, and it’s never let me down. [Check out this one] if you’re looking to add one to your kitchen.

Affiliate Disclosure:
Some of the links in this post are affiliate links. That means if you click through and make a purchase, I may earn a small commission—at no extra cost to you. I only recommend products I genuinely love and use in my own kitchen. Thanks for supporting Around Dusty Roads and helping me keep the skillet sizzling!


Skillet Lasagna

Affiliate Disclosure: This post contains affiliate links. If you click through and make a purchase, I may earn a small commission—at no extra cost to you. I only recommend products I genuinely use and love in my kitchen.


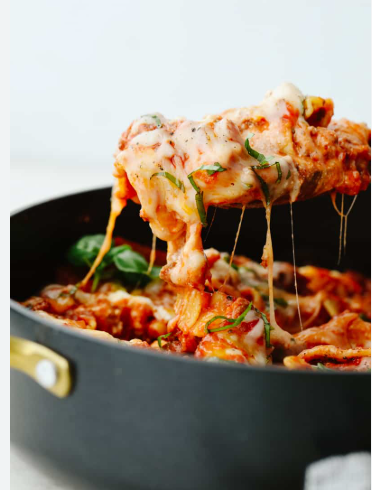
Time for Another Recipe Review: Skillet Lasagna

I’ve finally tackled a project I’ve been procrastinating on for years: sorting through my mountain of recipes. My pantry closet is bursting with cookbooks, and my desk has become a landing zone for printed recipes I’ve never tried. So I’ve set myself a challenge—test the promising ones, toss the duds, and organize the keepers into a tabbed folder I can actually use.

Some Early Favorites

I’ve already rediscovered a few gems. My cast iron meatloaf recipe? Total keeper. I haven’t made meatloaf any other way since I found it. Bonus points for easy cleanup—just line the pan with aluminum foil and you’re good to go. But I digress…

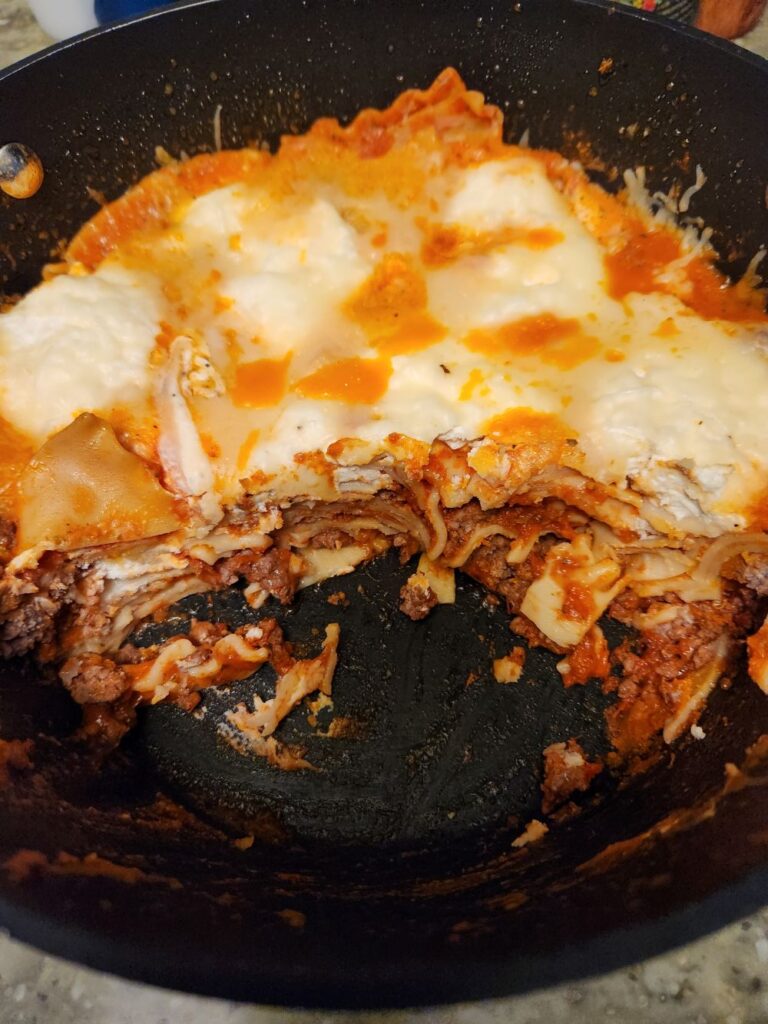
Let’s talk about a new contender: Skillet Lasagna.

Skillet Lasagna: A Weeknight Wonder?

This recipe promises a quicker, easier version of classic lasagna—no long baking times, no boiling noodles, and minimal mess. Sounds perfect for a busy weeknight, right?

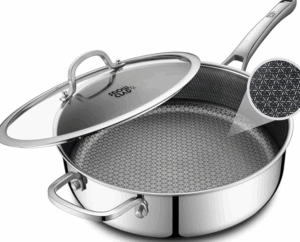
5 Quart Saute pan

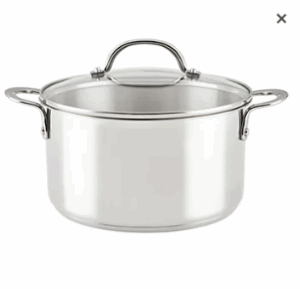
Stock pot

The catch? It calls for a deep skillet with a lid. I have plenty of pans with covers, but no deep skillet. And you know how I feel about using the right tool for the job. Still, before I splurge on a $30+ skillet, I wanted to test the recipe. So I reached for my trusty stock pot—and it worked surprisingly well!

The Evolution of Lasagna

I’ve always loved lasagna, but it really earned a spot in my regular rotation when “no-boil” noodles came on the scene. No more wrestling with limp, slippery pasta. Barilla even makes shorter noodles that fit perfectly in a lasagna pan—no snapping required. Life-changing.

But stovetop lasagna? That’s a twist I had to try.

Skillet Lasagna Recipe

Ingredients

  • 1 Tbs Olive Oil
  • 1/2 lb. of hamburger or Italian Sausage
  • 2 cloves of garlic
  • 24 oz. pasta sauce
  • 1 Cup water
  • 1/2 tsp. Italian Seasoning
  • 9 Lasagna Noodles  (regular not no boil)
  • 1 Cup Ricotta Cheese
  • 1/4 cup Grated Parmesan
  • 1/4 tsp salt
  • 1/4 tsp black pepper
  • 1 Cup shredded  mozzarella

Instructions

  1. Add meat and olive oil to large deep skillet. Cook over medium heat until meat is cooked through
  2. Mince Garlic and add to skillet with meat. Continue to sauté over medium heat for one more minute
  3. Add pasta sauce, Italian seasoning and water . Stir to combine
  4. Break Lasagna noodles into 1-2 inch pieces. Stir into the sauce in the skillet.
  5. Place lid on skillet. Turn heat up to medium high and allow sauce to come to a boil.
  6. Once boiling give the skillet a brief stir, replace the lid and turn the heat down to medium low. Let the noodles simmer in the sauce , stirring occasionally, until tender (about 15 minutes) If the sauce becomes too dry before the noodles are cooked through just add more water.
  7. While noodles are simmering, stir together the ricotta, Parmesan, salt and pepper in a separate bowl.
  8. Once the noodles have cooked , add the ricotta mixture  on top of the noodles in small dollops. Sprinkle the shredded mozzarella over the top.
  9. Place the skillet under your broiler for a few minutes  until cheese is melted and slightly browned. Make sure your skillet is oven safe and no lid.  Or (and this is what I did) place the lid on the skillet and cook over medium low heat until the cheese is melted.

Final Thoughts

Skillet Lasagna definitely delivers on flavor—it has that comforting lasagna vibe. But it’s more of a rustic mash-up than a tidy, layered square. Personally, I prefer the classic presentation, but if you’re craving lasagna and short on time, this version is a solid shortcut.

Stock photo

Would I make it again? Maybe. Will I keep the recipe? Yes. You be the judge. Let me know if you try it and what you think. Would you make it a “Keeper”?

photo credit Deb Neumann


🐚 Scallops: A Neighborhood Delicacy

🐚 Scallops: A Neighborhood Delicacy Worth Celebrating

It seems like all I do these days is write or talk about food—and honestly, I’m not mad about it. This time, I’m diving into one of my all-time favorite seafoods: scallops.

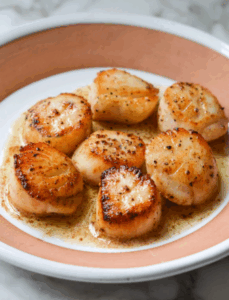
Pan Seared Scallops

Back in the day, Falmouth hosted a beloved Scallop Festival every year. I attended in 2015 and still remember the buttery aroma wafting through the tents. Sadly, I don’t think they’ve held it since before COVID, and I’m not sure why it disappeared. But there’s hope—New Bedford has resurrected Scallopalooza, and I’m definitely planning to check it out next year. Missed it this time, but scallops are always worth circling back to.

✨ Underrated No More

Scallops may have flown under the radar for years, but today they’re getting the fanfare they deserve. Sure, they might not rival lobster in prestige, but when cooked properly, scallops are pure melt-in-your-mouth magic. The trick? Don’t overcook them. A perfectly seared scallop is tender and sweet; an overcooked one turns into a chewy, rubbery lump—no thank you.

deep fried scallops

Because scallops are found in waters around the world, the ways to enjoy them are endless: sautéed in butter, nestled in soup, tossed with pasta, or simmered in stew. There’s a scallop for every mood and every meal.

🍽️ My Favorite Ways to Enjoy

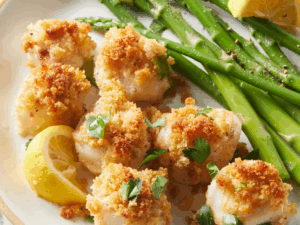
Personally, I love scallops deep-fried—especially the kind served at festivals and roadside stands. But pan-fried scallops are my go-to at home: quick, flavorful, and easy to master. They’re also divine in a wine sauce over pasta, or broiled and baked with stuffing. So many ways to savor these little gems!

Baked Stuffed Scallops


🔥 Perfect Seared Scallops with Garlic Basil Butter

Prep Time: 5 min
Cook Time: 5 min
Total Time: 10 min
Servings: 4 (3 scallops each)

Seared scallops cook fast—just 5 minutes—and are best served immediately. If you’re pairing them with pasta, veggies, or rice, have those ready to go before you start. I highly recommend finishing them with garlic basil butter for a fragrant, citrusy twist.

🧂 Ingredients

Scallops

  • 12 large sea scallops (1¼ to 1½ lbs)
  • 2 tsp all-purpose flour (optional)
  • Salt and freshly ground black pepper
  • 2 tbsp avocado or vegetable oil

Garlic Basil Butter

  • 1½ tbsp butter
  • 2 garlic cloves, minced
  • 1 cup fresh basil leaves
  • 3–4 lemon slices

👩‍🍳 Directions

  1. Pat scallops dry with a paper towel. Lightly dust one side with flour, then season with salt and pepper.
  2. Heat a wide skillet over medium-high. Add oil and let it shimmer.
  3. Place scallops in the pan, seasoned side down. Cook undisturbed for ~2 minutes until browned.
  4. While they brown, season the other side with flour, salt, and pepper.
  5. Flip scallops. If they stick, wait a few seconds and gently wiggle to release.
  6. Add butter and garlic to the pan, swirling as the butter melts.
  7. Cook another minute or two, then remove from heat. Stir in basil and lemon slices. Serve immediately.

Perfect Seared Scallops

For more details and a video walkthrough, check out Inspired Taste here.


Chicken and Dumplings its Not!

Not Every Recipe Works Out as Advertised

Most recently, I was in the mood for Chicken & Dumplings. It’s been a long time since I’ve made this classic dish, so I had to dig around for a recipe. I found one designed for a slow cooker—perfect! I love slow cooker recipes. Just set it and forget it, as Ron Popeil always said about his rotisserie. So I gathered my ingredients for a bubbly, comforting Chicken and Dumplings meal.

The Recipe

This is the recipe as it came to me and as I started out. Feel free to try is as printed. I’d love to hear your results.

Ingredients

  • 4 skinless, boneless chicken breast halves
  • 2 tablespoons butter
  • 2 (10.5 ounce) cans condensed cream of chicken soup
  • 1 medium onion, finely diced
  • 1 (10 ounce) package refrigerated biscuit dough
  • 2 cups water, or as needed to cover

Directions

  1. Place chicken, condensed soup, onion, and butter in a slow cooker. Add enough water to cover; stir well. Cover and cook on High for 5 to 6 hours.
  2. About 30 minutes before serving, tear biscuit dough into pieces. Place dough in the slow cooker. Cook until dough is no longer raw in the center.
  3. Serve hot and enjoy!

close up view of slow cooker chicken and dumplings in bowls, with a spoon

Looks good doesn’t it.

My results

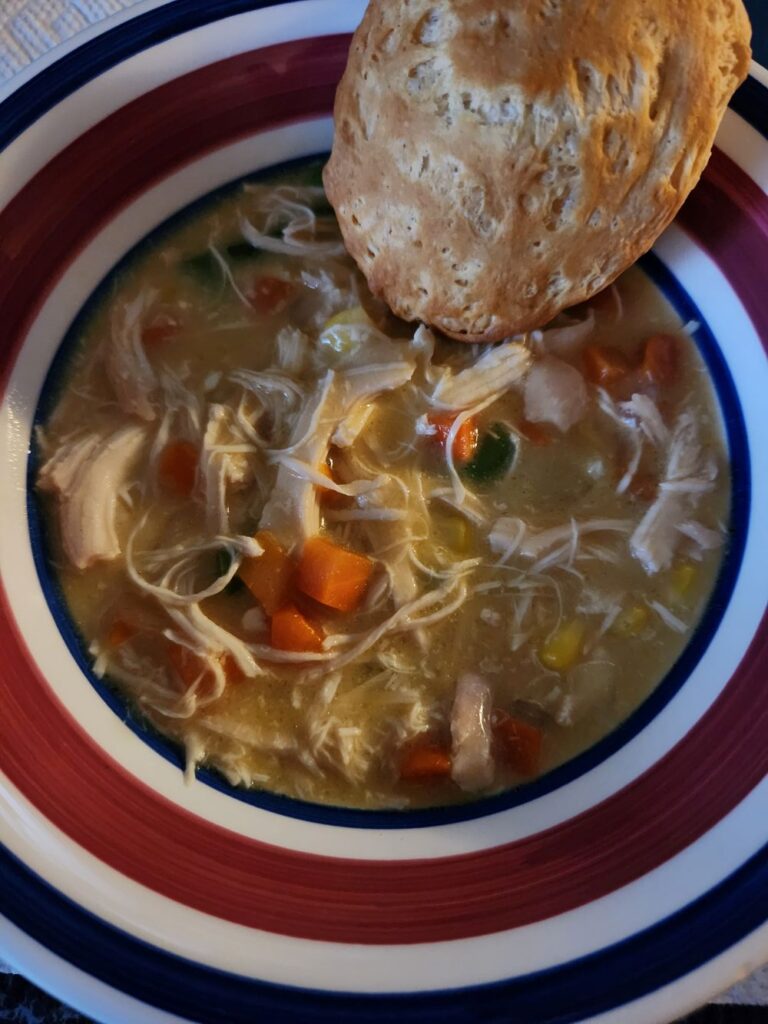
I shredded the chicken about 30 minutes before serving, but I noticed the broth was very thin—it lacked that rich, gravy-like consistency. So I made a small batch of roux, added some of the broth to bring it up to temperature, and then stirred it back into the pot. A roux is a mixture used to thicken sauces, soups, and stews, made by cooking equal parts flour and fat. That little tweak vastly improved the gravy portion of the dish.

Then I made a mistake. I added about a cup of frozen mixed veggies and replaced the cover. For some reason, the veggies came out hard and tasteless. I think I’ll skip them next time.

I also didn’t tear up the biscuit dough or add it to the mix. I’ve tried that before and didn’t love the result. You can give it a try, but I opted to bake the biscuits in the oven instead.

So my final result? Slow Cooker Chicken Stew and Biscuits. Not bad—but not one of my top 10 recipes. Next time, I’d use chicken broth instead of water for a richer flavor.


Johnny Appleseed

Apple Tree Images – Browse 1,167,336 Stock Photos, Vectors ...

stock photo

🍎 The Curious Legacy of Johnny Appleseed

Planting seeds of myth, nature, and kindness across early America

Who Was Johnny Appleseed?Johnny Appleseed

Johnny Appleseed wasn’t just a whimsical figure from folklore—he was a real man named John Chapman, born in 1774 in Leominster, Massachusetts. With a tin pot for a hat and bare feet toughened by miles of travel, Chapman became a symbol of simplicity, generosity, and harmony with nature. His mission? To plant apple orchards across the American frontier, offering sustenance and shade to settlers and wildlife alike.

Lancaster MA

A Life Rooted in Purpose

Chapman’s journey began in Pennsylvania and stretched westward into Ohio, Indiana, and Illinois. He didn’t scatter seeds randomly—he established nurseries, fenced them in, and returned regularly to tend them. His apples weren’t the sweet varieties we snack on today; they were mostly tart and used for cider, a staple in early American households.

A devout follower of the Swedenborgian faith, Chapman believed in living gently and spiritually. He was known for his kindness to animals, his deep connection to the land, and his ability to charm both Native American tribes and pioneer families. His barefoot wanderings and eccentric dress weren’t signs of poverty—they were expressions of his values.

Myth Meets Memory

Over time, Johnny Appleseed became a folk hero. Stories of him befriending wolves, sleeping under stars, and planting trees with divine purpose captured the imagination of generations. While some tales are embellished, the heart of his legacy remains: a man who walked with nature, gave freely, and left behind a living legacy of apple trees.

Apple Fruit Pictures | Download Free Images on Unsplash

stock photo


🍏 Big Apple Pancake Recipe

Perfect for crisp mornings and cozy storytelling

Ingredients

  • 1/2 cup All purpose flour
  • 1/2 Cup milk
  • 2 eggs
  • 2 TBS. butter or margarine- melted
  • 2 medium  apples peeled, cored, sliced
  • 1/2 Cup packed light brown sugar
  • 1 tsp. ground cinnamon

Directions

  1. Preheat oven to 400 degrees F
  2. Mix sugar and cinnamon, set aside
  3. Mix flout, milk and eggs together.
  4. Melt butter in a 9 inch cast iron skillet
  5. Pour mixture into skillet. Place sliced apples on top of mixture
  6. Sprinkle with Cinnamon sugar mixture
  7. Bake 20-30 minutes. Crust will rise and turn brown when done
  8. Serve from Cast Iron skillet

pancake and photo by Deb Neumann


Affiliate Disclosure: This post may contain affiliate links. If you click through and make a purchase, I may earn a small commission at no extra cost to you. I only recommend products I truly love and that align with the spirit of Around Dusty Roads.