Homemade “Crazy Puffs”

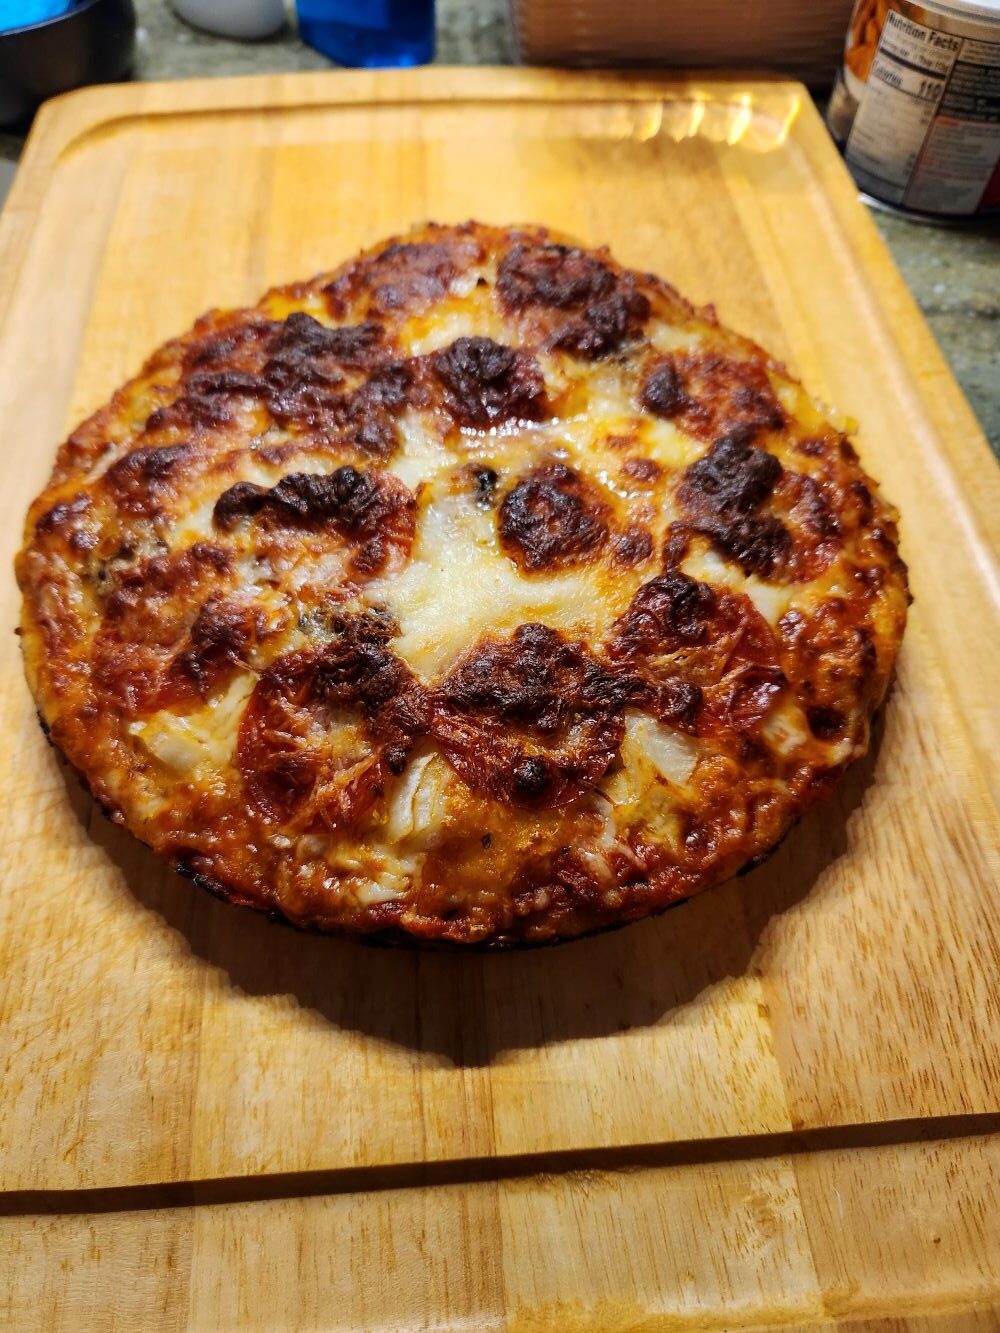
Homemade “Crazy Puffs” — My Mini Pizza Experiment

Before we take a little break from cooking posts (travel stories, kitty antics, and other fun things are calling), I wanted to squeeze in two more easy recipes. Today’s adventure: Crazy Puffs.

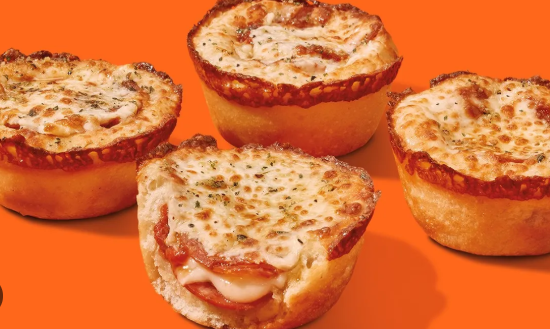
Have you ever tried Little Caesars’ Crazy Puffs? I’ve heard of them for ages, but since there’s no Little Caesars near me anymore, I’ve never actually tasted the real thing. Still, I love small portions and bite‑sized snacks, so while I was already playing around with pizza dough, I figured—why not try making my own version at home?

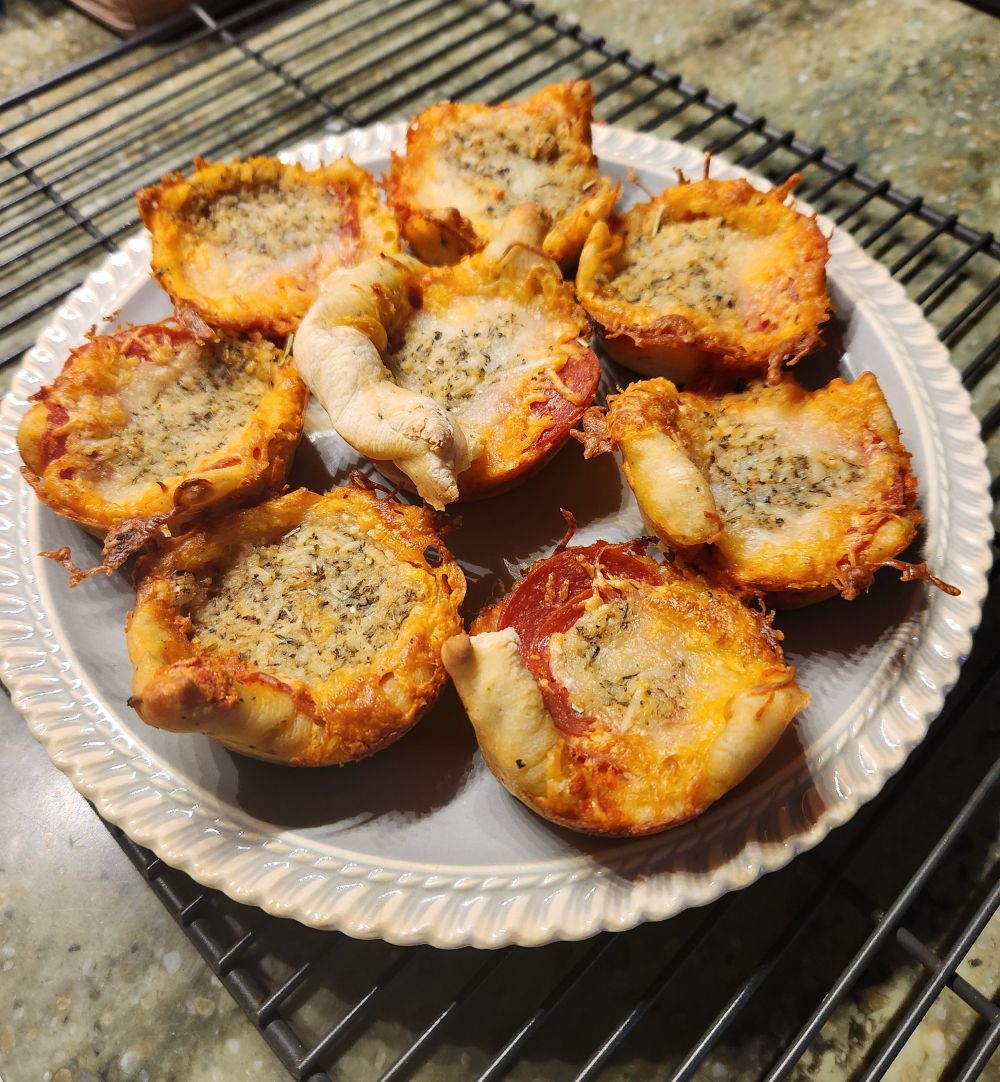
If you’ve never encountered a Crazy Puff, think of it as a bite‑sized pizza snack, about the size of a muffin, filled with classic pizza flavors. They’re designed to be handheld, easy, and fun—perfect for pizza lovers who want something quick and poppable.

So how do we make them at home?
I’ve got two versions. I’ve only tested one so far, but it came out great. The second version will be coming up in another post, and you can decide which one you like better.


Crazy Puffs — Version 1

Ingredients

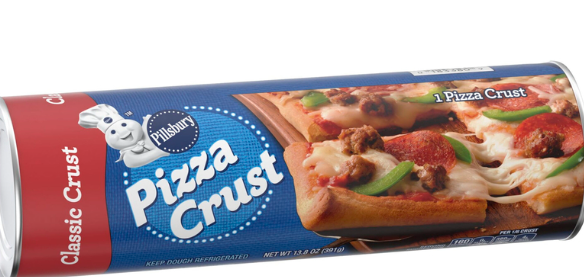
  • 1 (13.8‑oz) pizza crust, such as Pillsbury
  • 1/3 cup unsalted butter, melted
  • 1 tablespoon finely chopped fresh parsley
  • 2 teaspoons dried Italian seasoning
  • 2 teaspoons garlic salt
  • 1/4 teaspoon ground black pepper
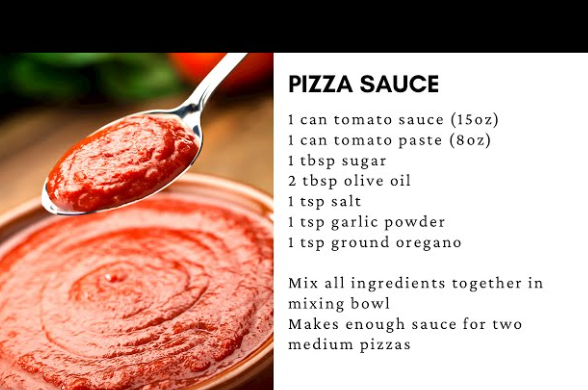
  • 1 1/2 cups jarred pizza sauce
  • 1 1/2 cups pepperoni slices
  • 4 cups pre‑shredded mozzarella cheese
  • 1/4 cup grated Parmesan cheese

Directions

  1. Preheat oven to 375°F. Place a baking sheet on the bottom rack. (that’s incase of drips)  Coat a shallow 12‑cup muffin tin with cooking spray.
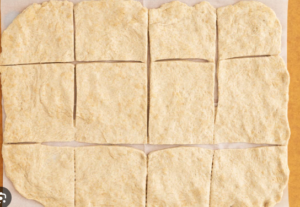
  2. Roll the pizza dough across the muffin tin, stretching it so it covers the entire surface. Using a pizza cutter, cut the dough into 12 squares. Discard any excess.
  3. Press each dough square into a muffin cup, bringing the dough halfway up the sides.
  4. In a small bowl, mix the melted butter, parsley, Italian seasoning, garlic salt, and black pepper. Brush the seasoned butter onto each dough cup.
  5. Add 1 teaspoon pizza sauce to each cup. Layer 2 slices of pepperoni, then 1 tablespoon mozzarella. Add 2 more slices of pepperoni, then 2 tablespoons mozzarella, pressing the cheese down so it stays inside the cup. Stir the Parmesan into the remaining butter mixture and drizzle a little over each puff.
  6. Bake for 15 minutes, or until the cheese is melted. Switch the oven to broil and broil for about 1 minute, just until the tops turn golden. Let cool for 2 minutes before serving.


I’ll share the second version soon. It has a couple of key differences and might even be easier—or at least less messy. You can be the judge.


Chicken and Broccoli Stir Fry


A Cautionary Tale of Conversions Gone Wrong

One of my favorite dinners is Chicken and Broccoli. I love the stuff and always order it when I get Chinese takeout. For years I’ve been trying to figure out what makes restaurant versions taste better than my own. I’ve tried over a dozen recipes, and while mine are good — even great — they never quite have that true “Chinese restaurant” vibe.

Recently I found a recipe that used seasonings I don’t normally reach for. I thought, Could this be it? Have I just been missing the right flavors all along? What follows is a tale that perfectly illustrates why I always recommend making a recipe as written the first time. Then — and only then — start tweaking.

Once More Unto the Breach

It’s been bitterly cold, and I hate the cold. Other than venturing out to clear snow off the car, I’ve basically been hibernating. That means I haven’t been to the store, and my spices and staples are running low. Still, I pulled out my wok, determined to give this recipe a try.

Step one: gather all ingredients. This is especially important with a wok — once you start, there’s no slowing down. The process moves fast.

Ingredients

  • 3 garlic cloves, finely chopped
    (All out. Will substitute garlic powder… what was that conversion again?)
  • ½ cup chicken broth
  • 1/3 cup soy sauce
  • 3 tablespoons honey
  • 2 tablespoons cornstarch
  • 1 tablespoon finely grated fresh ginger
    (Oops. Also out. Only have ginger powder.)
  • 2 teaspoons toasted sesame oil
  • 1 tablespoon neutral oil
  • 1 lb boneless chicken thighs or breasts, cut into ½‑inch pieces
  • 2 medium heads broccoli, cut into bite‑sized florets
  • Rice and toasted sesame seeds for serving

The problem: I had no idea what the correct conversions were for garlic powder or ginger powder. I could have — should have — taken a minute to look them up. But no. My wok was heating, I was excited, and I forged ahead using a 1:1 swap. In the back of my mind I knew powders are more concentrated, but momentum had taken over.

Directions

  1. In a small bowl, I whisked together the garlic powder, broth, soy sauce, honey, cornstarch, ginger, and sesame oil until the cornstarch dissolved.
  2. In my wok over high heat, I added the neutral oil and dumped in the chicken. It sizzled like crazy. After it released, I stirred and cooked it for another 5 minutes until done. Removed it to a plate.
  3. I lowered the heat to medium‑low and tossed in the broccoli and sauce mixture. The recipe said to cover and steam for 2–3 minutes.
    This is where disaster struck.
    I’d been uneasy about the 2 tablespoons of cornstarch, but the recipe definitely said tablespoons. The moment the sauce hit the broccoli, it seized into a solid mass. I had to scrape it off the bottom of the wok.
    Too. Much. Cornstarch.
    I grabbed a can of chicken broth and started pouring. I ended up using the whole can to thin the sauce — but it worked. Crisis averted.
  4. I uncovered the wok, returned the chicken and juices, and cooked for another minute or two. I didn’t need to wait for the sauce to thicken — it was already there. Next time I’ll try 2 teaspoons, not tablespoons.

Time to Taste

I skipped the rice and went straight for a bowl. It looked good. It smelled even better.

Then I took a bite.

WHOA.
My mouth exploded. The top of my head blew off.
Spicy!
Even with the extra broth, the flavor was intense. I hate to imagine what it would’ve been like without it.

The next day, I added a little water, microwaved a portion, and served it over egg noodles. Much milder — and honestly delicious. But let’s break down where things went wrong.


The Error of My Ways

1. The Spice Conversions

Garlic Powder Instead of Fresh Garlic

When a recipe calls for 1 clove of fresh garlic, finely chopped, use:

  • 1 clove fresh → 1/4 teaspoon garlic powder
Fresh Garlic Garlic Powder
1 clove 1/4 tsp
2 cloves 1/2 tsp
3 cloves 3/4 tsp
4 cloves 1 tsp

Ginger Powder Instead of Fresh Ginger

For 1 tablespoon fresh grated ginger, use:

  • 1/4 teaspoon ground ginger

Ground ginger is much more concentrated, so a tiny amount goes a long way.

2. The Cornstarch Catastrophe

This one wasn’t my fault — or at least not entirely. The recipe called for 2 tablespoons, which is far too much for a stir fry sauce. My accidental broth rescue probably saved the dish. The next day, after the flavors mellowed, it was actually wonderful.


Was It a Success?

Maybe… in spite of myself.
I’ll definitely try it again once my taste buds recover.

My Best Advice

Be careful with your conversions!
A little powder goes a long, long way.


Easy French Onion Soup

In anticipation of the pending closing of Welcoming Haven I thought I’d share some of my favorite recipes that were offered for sale in Mom’s recipe corner. Here’s one that makes creating a flavorful French Onion soup easy

Easy French Onion Soup – Comfort in a Bowl

There’s something magical about French Onion Soup—the way humble onions transform into a rich, golden, deeply flavorful broth that feels like a warm hug on a chilly day. This easy version keeps all the classic comfort without the fuss. Slow‑cooked onions turn sweet and caramelized, a splash of broth brings everything together, and of course, the best part: that toasted bread and melty cheese on top.
It’s simple, satisfying, and perfect for nights when you want something homemade and heartwarming without spending hours in the kitchen. Just the kind of recipe Mom would keep tucked in her favorite cookbook for a little  extra comfort.

Easy French Onion Soup

Ingredients

• 2 Tablespoons butter
• 4 large onions, thinly sliced
• 1 teaspoon ground black pepper
• ½ teaspoon garlic powder
• 32 oz. beef broth
• 3 tablespoons Worcestershire Sauce
• Salt to taste
• 4 slices thick crusty bread, toasted
• 4 slices of provolone or gruyere cheese

Instructions

1. Heat a Dutch oven or stock pot over medium heat, Add butter, melt. Add
sliced onions, pepper and garlic powder, sauté for 7-8 minutes until
tender.
2. Add beef broth, Worcestershire Sauce and salt to taste. Bring to a
simmer. Cover and simmer at least 10 minutes. Keep warm until ready
to serve.
3. Just before serving, preheat broiler. Arrange oven-proof individual
crocks, bowls or soup mugs with a wide mouth on baking sheet.
4. Ladle soup into bowls. Top each with a slice of toasted bread and a slice
of cheese, Place under broiler until cheese melts and is slightly golden.
Serve warm.

Notes

For Make Ahead, prepare the soup through the simmering stage, then cover
and refrigerate up to 2 days. When ready to serve, rewarm, soup on stovetop
and proceed with recipe.
Traditionally a splash of red wine is added during the simmering stage to give
the soup a fuller bodied, robust flavor. (optional)


Marinara vs. Pizza Sauce


What’s the Real Difference?

You’re in the grocery store planning a simple pizza night. As you scan the shelves, you see rows and rows of pasta sauces… and then a tiny little section labeled Pizza Sauce. Why so many options for one and barely any for the other? And what actually makes them different?

I wondered the same thing, so I asked. Here’s what I learned from my conversation with AI.
(And no—I haven’t tried this tweak yet, but it certainly makes sense.)


🍅 Marinara Sauce

Think: bright, chunky, quick‑cooked tomato goodness.

  • Made with crushed tomatoes, garlic, olive oil, and herbs
  • Cooked briefly, giving it a fresh, tangy, lighter flavor
  • Thinner consistency
  • Great for pasta, dipping, chicken parm, and more
  • Simple seasoning—no sugar, nothing heavy


🍕 Pizza Sauce

Think: thicker, richer, and built to handle high heat.

  • Often made from uncooked or lightly cooked tomatoes (many pizzerias use raw purée)
  • Seasoned more boldly: oregano, basil, garlic, onion powder, sometimes a touch of sugar
  • Thicker so it won’t make the dough soggy
  • Designed to hold up under high oven heat and melt right into the cheese

The Easiest Way to Remember

  • Marinara = pasta
  • Pizza sauce = dough + cheese + high heat

You can swap them if you’re in a pinch. If you’re making one of your skillet pizzas, marinara will work—just simmer it a bit longer so it thickens and doesn’t soak into the crust.


🍕 The 5‑Minute Tweak to Turn Marinara Into Pizza Sauce

If all you have is marinara but you want that classic pizzeria flavor, this quick fix does the trick.

🔥 What to Do

Warm your marinara in a small pan and let it gently simmer to thicken. Then add:

  • A pinch of oregano
  • A pinch of garlic powder (yes, even if there’s fresh garlic already)
  • A tiny pinch of onion powder
  • A small pinch of sugar if the sauce tastes too acidic
  • Optional: a spoonful of tomato paste for extra body

🎯 What You Get

  • A thicker sauce that won’t soak into your crust
  • A deeper, more concentrated flavor
  • That unmistakable “pizza sauce” aroma

It’s a tiny tweak, but it makes a noticeable difference—especially for skillet pizzas, where the sauce needs to stay put and let the crust crisp up beautifully.


Home Cooks, Count Your Blessings

 The 1950s Kitchen Rulebook

Every now and then, the internet serves up a list that makes you stop and say, “Thank goodness times have changed.” Recently I stumbled across a set of 20 rules women were supposedly expected to follow in the 1950s kitchen. Now, we all know that if it’s on the internet it must be true — but even if only half of these were real, it was quite an era to learn to cook in.

I grew up in the 1950s, so I couldn’t resist taking a walk down memory lane to see how I measure up to some of these old expectations. Here are the twenty rules, along with my own modern‑day scorecard.


Dinner on the Table and Meat Every Night

The first rule insisted dinner be ready the moment the husband walked in. I dodged that one — no husband, and I worked outside the home for years. If I’d tried to meet that rule, takeout would’ve been my best friend.

As for meat at every meal? That one stuck. I grew up with it, and to this day I’m a committed carnivore. A vegetarian life is not in my future.


Canned Goods, Perfect Presentation, and Mild Spices

We had an entire basement wall lined with canned goods, even though we had a garden. I still keep a few cans around, but fresh has definitely taken over.

Presentation, though? That 1950s standard lives on in me. After putting effort into a meal, I want it to look good. Maybe that’s a throwback, maybe it’s just pride.

Spices were simple back then — salt, pepper, paprika, garlic. Honestly, those are still my kitchen staples, though I’m slowly branching out.


Leftovers, Dessert, and the Clean‑As‑You‑Go Kitchen

Leftovers were never disguised in our house — they were celebrated. When I was working, I planned weekend meals specifically to create leftovers for the week.

Dessert every night was also the norm. Sometimes it was just pudding or Jell‑O, but it was something sweet. I still like a little treat, though these days it’s more likely berries or an orange.


And the clean kitchen rule? That one I follow religiously. With a tiny kitchen, cleaning as I go keeps me sane.


Recipes, Meal Structure, and Children at the Table

I still follow new recipes exactly the first time, then tweak them later. And yes, the old “meat, starch, vegetable, bread, dessert” structure is still in my bones — though I happily skip the starch if I’m in the mood for two veggies instead.

Kids were expected to eat what was served. That was true in my childhood home, and I doubt I’d ever be the type to cook two separate meals.


No One Sees the Effort — and Cooking Was “Women’s Work”

I admit it: I prefer to cook alone. “Help” usually slows me down.

Cooking being a woman’s responsibility? That was the norm then, but thankfully not now. Just look at all the men dominating the cooking channels.

The idea that a woman’s morals were reflected in her meals? That one feels downright silly today. I never felt that kind of pressure — and I wish I could ask my mother what she thought of it.


Entertaining, Brand Names, and the Noise at the Table

Entertaining meant elaborate menus, and I confess I still fall into that habit. I always made sure there was plenty of food — no tiny portions at my gatherings.

Brand loyalty was huge in the 50s. I’m slowly breaking that habit, even though my brain still insists the name brand “tastes better,” even when it probably doesn’t.

As for quiet meals? Not in our house. Dinner was loud, lively, and full of overlapping conversations.


Repeating Meals, Waste Not, and the Cook Eats Last

Repeating meals was frowned upon, but leftovers took care of that. I repeat meals simply because I like them.


Throwing food away because it wasn’t pretty? Absolutely not. Presentation matters, but not that much.

And yes — the cook eating last was a real thing, especially on holidays. Mom always made sure every dish made it to the table before she sat down.


A 1950s Kid’s Takeaway

So there you have it — my rundown of the 1950s kitchen rulebook. Some habits stuck, some faded, and some never made sense in the first place.

What about you — did you grow up with any of these rules, or do you still follow a few without even realizing it?