Apocalypse Chow

The Gourmet Guide to Apocalypse Chow: Because Even the End Times Deserve Flavor

I don’t usually write political posts. I prefer cats, nature, and the occasional pun about moss. But lately, things feel like they’re sliding downhill on a greased-up sled. Trump’s announced more tariffs, comedians are being banned from free speech, and the general vibe is somewhere between “dystopian novel” and “bad improv night.” What’s next—mandatory beige clothing and government-issued tofu? It’s time to prepare for the coming collapse of civilization as we know it. And by prepare, I mean hoard snacks.


🥫 Canned Goods: The VIPs of the Bunker Ball

Canned beans, chili, peaches, and mystery meat (we’re looking at you, Spam) are the backbone of any respectable doomsday diet. They last forever, require zero refrigeration, and double as weights for your post-apocalyptic workout routine. Bonus: the labels make great wallpaper when you redecorate your bunker.


1,049,000+ Rice Stock Photos, Pictures & Royalty-Free Images ...🍝 Pasta & Rice: Carbs for the Collapse

When the grid goes down and your sourdough starter becomes a science experiment, dry pasta and rice will be your best friends. They’re easy to store, easy to cook, and perfect for pretending everything’s fine while you eat your fifth bowl of apocalypse Alfredo.


🍫 Chocolate: Sanity in a Wrapper

Yes, it melts. Yes, it’s technically non-essential. But let’s be honest—if you’re going to barter for toilet paper or negotiate peace with a rogue band of feral toddlers, chocolate is your golden ticket. Stock up like your emotional stability depends on it. Because it does.


🧂 Spices & Condiments: Flavor the Fallout

Salt, hot sauce, mustard, and that weird jar of pickled jalapeños you forgot about—these are the unsung heroes of survival cuisine. They turn bland beans into gourmet despair and give you something to brag about during bunker dinner parties.


🐱 Bonus Round: Cat Treats (Because Banner and Balboa Deserve Luxury Too)

Your feline overlords will still expect five-star service. Stock up on their favorite treats unless you want them plotting your overthrow. Remember: in the apocalypse, the cats are in charge.


Final Thought: Hoard wisely, laugh often, and never underestimate the morale-boosting power of a well-timed snack. The end of the world might be messy—but your pantry doesn’t have to be.


Johnny Appleseed

Apple Tree Images – Browse 1,167,336 Stock Photos, Vectors ...

stock photo

🍎 The Curious Legacy of Johnny Appleseed

Planting seeds of myth, nature, and kindness across early America

Who Was Johnny Appleseed?Johnny Appleseed

Johnny Appleseed wasn’t just a whimsical figure from folklore—he was a real man named John Chapman, born in 1774 in Leominster, Massachusetts. With a tin pot for a hat and bare feet toughened by miles of travel, Chapman became a symbol of simplicity, generosity, and harmony with nature. His mission? To plant apple orchards across the American frontier, offering sustenance and shade to settlers and wildlife alike.

Lancaster MA

A Life Rooted in Purpose

Chapman’s journey began in Pennsylvania and stretched westward into Ohio, Indiana, and Illinois. He didn’t scatter seeds randomly—he established nurseries, fenced them in, and returned regularly to tend them. His apples weren’t the sweet varieties we snack on today; they were mostly tart and used for cider, a staple in early American households.

A devout follower of the Swedenborgian faith, Chapman believed in living gently and spiritually. He was known for his kindness to animals, his deep connection to the land, and his ability to charm both Native American tribes and pioneer families. His barefoot wanderings and eccentric dress weren’t signs of poverty—they were expressions of his values.

Myth Meets Memory

Over time, Johnny Appleseed became a folk hero. Stories of him befriending wolves, sleeping under stars, and planting trees with divine purpose captured the imagination of generations. While some tales are embellished, the heart of his legacy remains: a man who walked with nature, gave freely, and left behind a living legacy of apple trees.

Apple Fruit Pictures | Download Free Images on Unsplash

stock photo


🍏 Big Apple Pancake Recipe

Perfect for crisp mornings and cozy storytelling

Ingredients

  • 1/2 cup All purpose flour
  • 1/2 Cup milk
  • 2 eggs
  • 2 TBS. butter or margarine- melted
  • 2 medium  apples peeled, cored, sliced
  • 1/2 Cup packed light brown sugar
  • 1 tsp. ground cinnamon

Directions

  1. Preheat oven to 400 degrees F
  2. Mix sugar and cinnamon, set aside
  3. Mix flout, milk and eggs together.
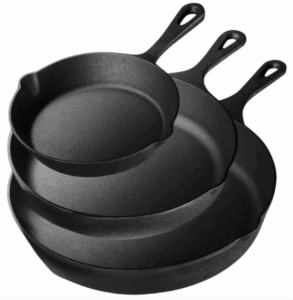
  4. Melt butter in a 9 inch cast iron skillet
  5. Pour mixture into skillet. Place sliced apples on top of mixture
  6. Sprinkle with Cinnamon sugar mixture
  7. Bake 20-30 minutes. Crust will rise and turn brown when done
  8. Serve from Cast Iron skillet

pancake and photo by Deb Neumann


Affiliate Disclosure: This post may contain affiliate links. If you click through and make a purchase, I may earn a small commission at no extra cost to you. I only recommend products I truly love and that align with the spirit of Around Dusty Roads.


Decadent Treat from the Sea

Maine Lobster- photo credit Deb Neumann


Broiled Decadence

I was born in the wrong time in history. My absolute favorite treat is broiled lobster tails. Any lobster is good—but I’m addicted to the tails.

Lobster wasn’t always the elite culinary gem it is today. At one time, it was so plentiful it was considered poor man’s food—fed to prisoners and even pigs. Can you imagine tossing a $50 lobster into a pigpen? And yes, I found a website selling Maine lobster tails for $58.99, so I’m not exaggerating when I say a “trash meal” turned treasure.


Maine Lobster vs. Rock Lobster

Every trip to Florida—especially the Florida Keys—includes at least one (usually more) stop for lobster tails. Why Florida? Because they use spiny lobsters, also called Rock Lobsters. These clawless crustaceans pack all their meat in the tail. The tails are larger, firmer, and have a brinier taste than Maine lobster.

Maine lobsters are great, but just using the tail feels like a waste. Let’s boil that beauty and enjoy the delicate claw meat too. Best to use a real Lobster Pot, not just any pan.

Fun fact: When I was younger, I had a lobster license and used to scuba dive for Maine lobsters. I could enjoy a lobster meal anytime I was willing to dive—which was often!

snuba at Turtletown 2020


National Lobster Day

Today is National Lobster Day, so head to your nearest seafood restaurant or fish market for an annual treat of broiled lobster. Restaurants might make it sound like preparing tails is a mystical art, but it’s really quite simple. Just don’t overcook them—nothing worse than a dry lobster tail.

Around here, it’s easy to find Maine lobster tails. Occasionally (though rarely), you’ll spot Langostinos—small crustaceans often substituted for real lobster. They’re tasty, but more closely related to crabs than lobsters. So for today, let’s go with the real thing.

Broiled Rock Lobster tails- Key Largo 2019 photo Deb Neumann


Let’s Cook

Ingredients

  • 4 lobster tails (10 oz each, or adjust cooking time for other sizes)
  • ¼ cup salted butter, melted (½ stick)
  • 2 cloves garlic, crushed
  • 2 tsp lemon juice
  • ½ tsp smoked paprika
  • Pinch of cayenne pepper

Instructions

  1. Thaw the tails
    If frozen, thaw overnight in the fridge or in a sealed bag submerged in cold water for about 30 minutes.
  2. Preheat the oven
    Set to Broil (500°F / 260°C). Position the oven rack so the lobster tails on a baking sheet are 4–5 inches from the broiler.
  3. Butterfly the lobster tails
    Using kitchen shears, cut down the center of the shell lengthwise (top side only), stopping at the tail fin. Gently pull the meat upward, leaving the end attached. Rest the meat on top of the shell.
  4. Make the butter mixture
    In a small bowl, whisk together melted butter, garlic, lemon juice, smoked paprika, and cayenne. Brush generously over the lobster meat.
  5. Broil the tails
    Cook until the meat is opaque and lightly browned—about 1 minute per ounce. (10 oz tails = 10 minutes; 5 oz tails = 5 minutes.)
  6. Serve with melted butter
    For extra indulgence, try drawn butter—it takes a little more effort but yields a clear, golden dip with rich flavor.

How to Butterfly a Lobster Tail


Affiliate Disclosure

Some of the links in this post may be affiliate links. This means if you click through and make a purchase, I may earn a small commission at no extra cost to you. I only recommend products I truly love—especially when they involve lobster tails!


Warm and Comforting-Classic Potato Soup

🥔 A Hug in a Bowl: Classic Potato Soup for Cozy Days

There’s something magical about potato soup. It’s humble, hearty, and healing—like a warm hug from your favorite sweater or a purring cat curled up beside you. Whether you’re snowed in, rained out, or simply craving comfort, this classic soup delivers every time.

🌿 Why Potato Soup Feels Like Home

Potato soup is the kind of dish that doesn’t ask for much—just a few pantry staples, a good pot, and a little patience. It’s the scent of sautéed onions, the gentle simmer of broth, and the creamy swirl of milk or cream that transforms simple spuds into something soul-soothing.

Creamy Potato Soup

photo credit- The Kitchen

Banner and Balboa, my feline muses, always seem to appear when the soup pot comes out. Maybe it’s the aroma. Maybe it’s the promise of warmth. Either way, they know something good is brewing.

🧄 The Recipe: Simple, Satisfying, and Soothing

Ingredients:

  • 4–5 medium potatoes, peeled and diced
  • 1 onion, chopped
  • 6 slices of bacon, chopped
  • 4 cups vegetable or chicken broth
  • 1 cup milk or cream
  • Salt, pepper, and thyme to taste
  • Optional: shredded cheddar, crispy bacon, chives
Can You Eat Raw Potatoes? Here's What a Dietitian Says

The main ingredient

Instructions:

  1. In a sturdy soup pot, sauté onion and bacon until fragrant.
  2. Add diced potatoes and broth. Simmer until potatoes are tender.
  3. Mash some of the potatoes for creaminess, then stir in milk or cream.
  4. Season to taste. Top with your favorite garnishes.

Serve hot in a bowl that feels like it was made for moments like this.

🍲 Cozy Up with These Essentials

To make your potato soup ritual even more delightful, I’ve curated a few affiliate-friendly finds that blend beauty and function:

  • Soup Bowls: These Kook Ceramic Bowls1 are marshmallow-white, microwave-safe, and perfect for stews, soups, or even a scoop of ice cream on the side.
  • Soup Pot: This Stainless Steel Soup Pot2 is oven-safe, induction-ready, and polished to perfection. It’s a kitchen workhorse with a touch of elegance.
  • Kitchen Gadget: Chop, slice, and dice with ease using this Vegetable Chopper & Mandolin Slicer3—a 10-in-1 tool that makes prep a breeze.

📝 Affiliate Disclosure

Some of the links in this post are affiliate links, which means I may earn a small commission if you make a purchase—at no extra cost to you. I only recommend products I genuinely love and use in my own kitchen. Thanks for supporting Around Dusty Roads and helping keep the storytelling flowing.


📣 Share Your Soup Stories

Do you have a favorite soup recipe that warms your soul? A childhood memory tied to a steaming bowl? I’d love to hear it! Drop your stories, tips, or twists in the comments. Let’s build a cozy collection of comfort food together.

the pioneer woman's perfect potato soup recipe

Photo Pioneer Woman

Crispy Deliciousness


🥔 Crispy Delicious Potato Skins

I always assumed those cheesy, crunchy appetizers known as potato skins were deep-fried. But recently, I stumbled across a recipe for oven-baked skins—and I had questions. Could baking really deliver that decadent, crispy shell? Let’s dig into the golden goodness and find out. Feel free to chime in with tips, tricks, or tasty tweaks. To help you get started, I’ve included affiliate links to appliances that make crispy success a breeze.

Disclosure: This post includes affiliate links. I may earn a commission if you purchase through them, at no additional cost to you.


🧑‍🍳 To Fry or Not to Fry—That Is the Question

Traditionally, restaurant-style potato skins rely on deep frying to achieve their signature crunch. However, modern recipes often swap the fryer for the oven or air fryer, offering a healthier twist without sacrificing texture. Regardless of the method, most versions get loaded with cheese and bacon, then baked just long enough to melt the toppings into gooey perfection.


🔍 How Restaurants Make Potato Skins

Here’s the classic process, step by step:

  • Bake: Start by baking whole potatoes until tender.
  • Scoop: Slice them lengthwise and scoop out the centers, leaving about ¼ to 1 inch of flesh.
  • Fry: Drop the shells into hot oil until they turn golden and crisp.
  • Top: Fill each skin with cheese, bacon, and green onions.
  • Bake Again: Pop them back in the oven to melt the cheese.
  • Serve: Finish with a dollop of sour cream and serve hot.

🌿 Healthier Variations Exist

If you’re looking to lighten things up, you’re not alone. Many home cooks and restaurants now offer baked or air-fried versions that skip the deep fryer altogether.

  • Baked Skins: After scooping, brush the shells with seasoned oil and bake until crisp. A quick broil at the end adds extra crunch.
  • Air-Fried Skins: These deliver a similar texture with less oil and faster cook time.

🧀 Loaded Baked Potato Skins (Oven Method)

Servings: 4
Prep Time: ~1 hour

Allrecipes

Ingredients:

  • 4 large baking potatoes, scrubbed
  • 3 tbsp olive oil
  • 1 tbsp grated Parmesan cheese
  • ½ tsp salt
  • ¼ tsp garlic powder
  • ¼ tsp ground paprika
  • ⅛ tsp ground black pepper
  • 1½ cups shredded sharp Cheddar cheese
  • 8 slices cooked bacon, crumbled
  • ½ cup sour cream
  • 4 green onions, sliced

Directions:

Step 1: Preheat oven to 450°F (230°C). Gather all ingredients.
Step 2: Prick potatoes with a fork and bake until tender—about 50 minutes to 1 hour.
Step 3: Let cool slightly, then slice lengthwise and scoop out the flesh, leaving a ¼-inch shell. Save the scooped potato for another dish.

Step 4: Mix olive oil, Parmesan, salt, garlic powder, paprika, and pepper. Brush mixture over both sides of the skins.

Step 5: Bake skins for 10 minutes, flipping halfway through, until crisp.

Step 6: Sprinkle with cheese and bacon. Return to oven for 2 minutes, just until cheese melts.

Step 7: Serve hot, topped with sour cream and green onions.


Mine didn’t win any beauty contests—and I was fresh out of sour cream—but they still turned out crispy, cheesy, and downright delicious. If you’ve got a favorite twist or topping, I’d love to hear it!

photo credit Deb Neumann

Affiliate Disclosure: Some of the links in this post are affiliate links, which means I may earn a small commission if you make a purchase—at no extra cost to you. I only recommend products I genuinely love and think you’ll enjoy too. Thanks for supporting Around Dusty Roads and helping keep the storytelling flowing

Find Small Appliances Here 

And at Welcoming Haven