
My Use-It-Up Dinner of Chicken Piccata

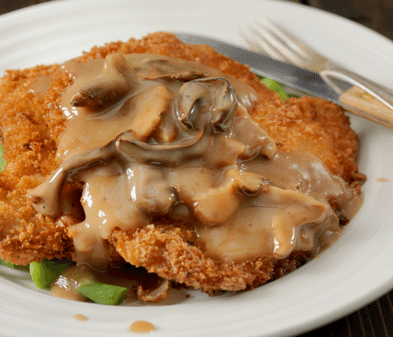
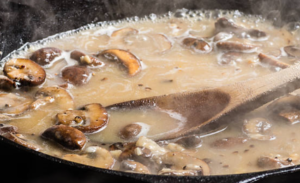
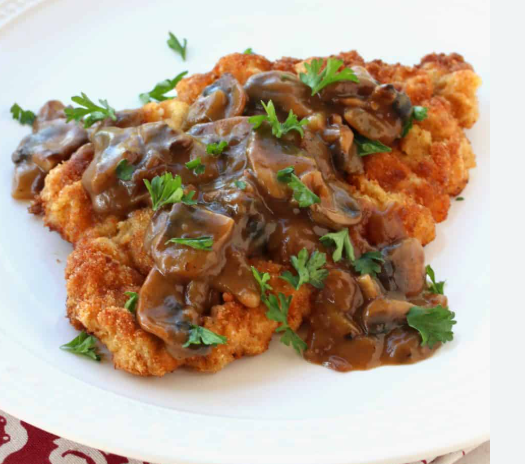
Chicken piccata in a skillet waiting to be served


Back to Basics: My Makeshift Chicken Piccata

I haven’t shared a recipe in a while. It’s not because I haven’t been cooking — I have — but nothing new has been coming out of my kitchen lately. I’ve been in one of those same old, same old phases. I always fall into that after a couple of kitchen failures. When something flops, I retreat to my old standbys for comfort.

A Couple of Cookie Disasters

Recently I had two cookie mishaps in a row.
The first one was my fault — I misread the recipe. The second one? The only explanation I can come up with is that my oven temperature was off. What should have been soft, fluffy, cake‑like molasses cookies came out flat as a pancake. The best way to describe them is a thin, chewy ginger snap.

I’ve got an oven thermometer on the way, so hopefully that mystery gets solved soon. In the meantime, I’ve been keeping things pretty basic.

The Chicken Broth and Lemon Situation

Tonight I found myself staring at a nearly full box of chicken broth and two lemons that were about to give up on life. I needed to use them — but I didn’t have any veggies for a stir fry, and all I had was chicken breast. So… what to make?

I have tons of chicken recipes, but every one I pulled out needed something I didn’t have.
This one wanted white wine.
That one wanted broccoli.
Another wanted asparagus.

And then I saw it: Chicken Piccata.
I haven’t made it in ages. It’s easy, quick, and the leftovers warm up beautifully.

So that’s what I made — my makeshift dinner to use up the broth and lemons.


Chicken Piccata

Ingredients

Chicken:

  • 4 chicken breasts
  • ½ cup flour
  • 1 lemon
  • 2 tablespoons vegetable oil (olive oil recommended)
  • Salt and pepper to taste

For the Sauce:

  • ¼ cup butter
  • 1½ tablespoons flour
  • 1 cup chicken broth
  • ½ cup white wine or additional chicken broth
  • 2 tablespoons capers
  • 2 tablespoons fresh parsley

Instructions

  1. Prep the chicken:
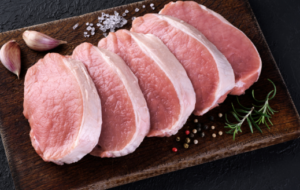
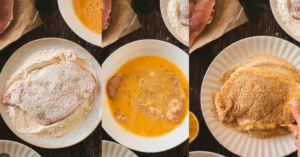
    Place the chicken breasts between two sheets of plastic wrap and pound them to an even ½‑inch thickness.
  2. Dredge:
    Combine flour, lemon zest (zest ½ the lemon), salt, and pepper. Dredge the chicken in the flour mixture and set aside.
  3. Cook the chicken:
    Heat the oil in a large skillet over medium‑high heat. Cook the chicken 4–5 minutes per side, until just cooked through. Cook in batches if needed. Remove and set aside.
  4. Make the roux:
    In the same pan, melt the butter. Add the 1½ tablespoons of flour and whisk until smooth.
  5. Build the sauce:
    Gradually whisk in the chicken broth, a little at a time, until smooth.
  6. Add flavor:
    Add lemon juice, white wine (or more broth), and capers. Simmer for 3 minutes, whisking occasionally.
  7. Finish:
    Return the chicken to the pan and simmer 2–3 minutes more. Stir in parsley and serve over pasta.


And that, my friends, was my “use‑it‑up” dinner — born from leftover chicken broth and two lemons on their last legs. If you try it, let me know how yours turns out.


A Local Gem! Happy National Donut Day!


🍩 Happy National Donut Day!

Do you know what today is? Not Hump Day — National Donut Day.
And you know what that means: free donuts. Yes, Dunkin’ is handing them out today. Is this a great country or what.

There is one tiny catch: you need to buy a beverage. But honestly… who eats a donut without something to drink?


⭐ A Donut Lover’s Confession

I’m a true donut fan. If I weren’t on a permanent diet, I’d happily eat one every day — though I doubt it would keep the doctor away. Still, I consider myself a donut connoisseur. I know a good donut when I see one.

And this week? I didn’t just see one.
I came, I saw, I tasted, and I ascended straight to donut nirvana. These donuts were better than my mom’s (sorry, Mom), and hers were legendary.

Where did I find this bliss?
The Colonial Do‑Nut Shop kiosk inside Morton Hospital.

A police officer stands at the counter of the Colonial Do‑Nut Shop kiosk inside Morton Hospital, with staff preparing donuts behind the counter.

Colonial Do‑Nut Shop – Morton Hospital Kiosk


⭐ Colonial Do‑Nut: A Taunton Classic

Colonial Do‑Nut Shop has been serving Taunton for more than 70 years. The pandemic forced them to close, but they came back strong, reopening under new ownership in 2024.

The flagship shop at 91 Broadway is still right where it’s always been — turning out fresh donuts, crullers, and breakfast sandwiches. Just get there early: they close at noon.

So how did I get mine at Morton Hospital?
When the new owners were preparing to reopen Broadway, the opportunity came up to open a satellite location in the hospital lobby. The donuts are baked fresh on Broadway every morning and delivered to the kiosk.


⭐ The Old Fashioned That Stole My Heart

I’m an “Old Fashioned” girl — plain, crispy outside, tender inside, with a whisper of cinnamon and a hint of nutmeg. And these? Hands down the best.

I meant to take a picture, but… well… I started eating it. You understand.


Happy National Donut Day!
It may not be free at Colonial Do‑Nut, but if you can get there, it will be so worth it.

Freshly baked chocolate chip cookies cooling on a wire rack

Cookies- And they all Started in Massachusetts

CoooKies! Nothing like a good chocolate chip cookie to put a smile on Cookie Monster's face. And it all started in Massachusetts


Massachusetts: The Unsuspecting Cookie Capital

Ah, food. Is it any wonder I write about eating so often? Sure, we all need food to live, but that’s not the real reason. The real reason is simple: I love sharing recipes and little bits of cooking lore.

I’m not turning Around Dusty Roads into a cooking blog — don’t worry — but while I’m enjoying a slice of my angel food cake (it’s pretty yummy), I want to share a little tasty Massachusetts baking history.

Because believe it or not, this state didn’t just give the world one iconic cookie.
It gave us two.


The Toll House Cookie: A Massachusetts Original

Let’s start with the queen of cookies: the classic chocolate chip — or as we call it around here, the Toll House Cookie.

We can thank Ruth Wakefield for this masterpiece. People have tried every variation under the sun — M&M’s, butterscotch, pretzels, sea salt — but nothing beats the original. Warm, melty, simple perfection.

I haven’t been to Faneuil Hall lately, but they used to have an entire kiosk devoted to chocolate chip cookies. Warm from the oven, wildly overpriced, and absolutely irresistible. It was always my first stop.

Where it all began

The Toll House Inn in Whitman, Massachusetts opened in 1930, run by Ruth and her husband Kenneth Wakefield. The building itself dated back to 1817, but Ruth’s cooking was what made the place famous.

One day she served a butter‑drop cookie studded with chopped chocolate. Customers went wild. Ruth, being a smart cookie herself, realized she had something special.

So she struck a deal with Nestlé — a lifetime supply of chocolate in exchange for printing her recipe on their semi‑sweet chocolate chip bags.


A sweet deal indeed.

The original Toll House Inn sadly burned down in 1984, but you can still visit the historical marker at 362 Bedford Street, Whitman, MA, where the world’s favorite cookie was born.


The Fig Newton: Massachusetts’ Other Claim to Cookie Fame

So what’s the second cookie?
That would be the humble, beloved Fig Newton.

You don’t usually find people casually baking Fig Newtons at home — these are very much a commercial cookie. Maybe not as universally adored as the chocolate chip, but they’ve earned their place in the cookie hall of fame.

A cookie named after Newton

The Fig Newton was created in 1891 at the Kennedy Biscuit Works in Cambridgeport, and named after the nearby town of Newton. It was one of the very first mass‑produced baked goods in the United States.

Originally, Fig Newtons were made of a soft, cake‑like dough wrapped around a thick fig jam. They were so popular that the brand eventually shortened the name to simply Newtons, and added flavors like strawberry and raspberry.

Still, the fig version remains the classic.

If you’re a truly determined baker, you can find recipes for homemade Fig Newtons. And if you ever make them, I want the full report.


Final Crumb

Massachusetts may be famous for its history, its coastline, and its questionable driving habits, but it deserves a little credit for its contributions to the cookie world too.

Two iconic treats — one homemade, one commercial — both born right here.

Now if you’ll excuse me, I’m going back to my angel food cake.

The Great Chowder Divide

Clam laden New England Chowder with it's cream base sets the stage for this culinary debate

Cream vs. Tomato, and the Day Massachusetts Nearly Legislated Soup

Let me start with a confession:
I don’t actually like clams.

There, I said it. Full transparency.
I’ll happily eat around them, enjoy the broth, dip the crackers, and savor the moment — but the clams themselves? They can stay in the bowl and live their best life without me.

And yet… here I am writing about chowder. Because chowder isn’t just about clams. It’s about identity, tradition, and one of the most passionate food debates New England has ever cooked up.

And yes — it was almost illegal to put tomatoes in it.


The 1939 Chowder Crisis: A Massachusetts Original

It didn’t come from rumor or restaurant gossip.
No whispered “my cousin’s friend swears this happened” stories.
This moment lives in the official records of the Massachusetts legislature.

In 1939, Representative Cleveland Sleeper of Rockport, Massachusetts introduced a bill to ban tomatoes from clam chowder. He believed the integrity of New England chowder was under threat, and he was ready to defend it with the full force of government.

Sleeper even staged a chowder cook‑off to prove his point:

  • One pot of classic, cream‑based New England chowder
  • One pot of tomato‑based Manhattan chowder

The cream version won — of course it did — and the bill quietly faded away. But the message was loud and clear:

In Massachusetts, chowder is white. Full stop.


New England Clam Chowder: The Creamy Classic

This is the chowder that tastes like home, even if you don’t like clams. It’s the bowl you want on a cold day when the wind is coming off the water sideways.

What makes it unmistakably New England:

  • A rich, creamy broth
  • Potatoes, onions, and clams
  • Salt pork or bacon for depth
  • Oyster crackers bobbing like tiny buoys

It’s cozy. There’s a familiar nostalgia to it. It’s the culinary equivalent of a wool sweater and a nor’easter warning.


Manhattan Clam Chowder: The Tomato Rebel

Then there’s the red one.

Manhattan chowder swaps cream for tomatoes, creating a broth that’s bright, tangy, and a little bold. It’s lighter, more vegetable‑forward, and honestly? Pretty delicious — even if you have to whisper that in certain Massachusetts zip codes.

What defines it:

  • Tomato‑based broth
  • Carrots, celery, herbs
  • A lighter, almost Mediterranean feel
  • Clams that stand out instead of hiding in cream

It’s not trying to be New England chowder. It’s doing its own thing — and doing it well.


So Which One Wins?

Here’s the truth, clam‑skeptic though I may be:

They’re both good — just in different ways.

  • New England chowder is for comfort, cold days, and tradition.
  • Manhattan chowder is for brightness, lightness, and a little rebellion.

It’s like comparing a snowstorm to a sunny day. Both have their place — though only one requires you to shovel your driveway.


Final Ladleful: You Be the Judge

I may not love clams, but I do love a good food debate — and chowder brings out the best of them. Whether you’re Team Cream, Team Tomato, or Team “I’ll just take the crackers,” chowder tells a story worth sharing.

Now it’s your turn:

Which chowder do you swear by?
Creamy New England?
Tomato‑bright Manhattan?
Or do you have a family version that breaks all the rules?

Drop your thoughts, opinions, and observations — I can’t wait to hear where you land in the Great Chowder Divide.


The Reverse Sear: A New Englander’s Indoor Steak Victory

Raw sirloin steak prepared for a reverse‑sear recipe, shown with garlic on parchment.

Life Before the Condo Rules

New Englanders are a hearty lot. Around here, there’s no such thing as “Grilling Season.” We grill in snowstorms, nor’easters, and the occasional blizzard just to feel alive. I was no different. I cooked everything on my Weber — steaks, turkeys, potatoes, corn, kabobs, chicken, fish. Honestly, I used my grill more than my stove.

Then I bought my condo.

It has a lovely west‑facing deck, and I pictured myself out there year‑round, happily grilling under shelter like a civilized cavewoman. What I didn’t picture was the fire code. Not only could I not grill on the deck, I couldn’t even store a grill there. The only allowed option was an electric grill and… well… if I’m going to cook on a glorified space heater, I might as well use my stove.

So began my quest: how do you cook a steak indoors that still satisfies the primal red‑meat urge?


My Cast Iron Era: The Classic Pan Sear

For years, my go‑to method was the classic pan sear in my beloved cast iron skillet. If you’ve never done it, here’s the quick version:

How a Traditional Pan Sear Works

  • Heat a cast iron skillet until it’s smoking hot.
  • While it heats, coat your steak lightly in vegetable oil, salt, and pepper.
  • Lay the steak in the pan — you’ll get that glorious sizzle and a puff of smoke that could set off every alarm in the building.
  • Sear for a couple of minutes on the first side to build a crust, then flip and repeat.
  • Remove from heat and let it rest while you prep your sides.

It’s fast, it’s flavorful, and it gives a great crust. But it also fills the kitchen with smoke, and the inside of the steak can go from rare to overcooked in a heartbeat.

Lately, I wanted something better — something more steakhouse‑level without steakhouse prices.

And that’s when I found it.


Enter: The Reverse Sear

I’m only one person, and after years of dieting, I can’t eat a whole steak in one sitting. So when Hannaford’s had one of their rare steak sales, I grabbed a nice sirloin for $13. It was small, so I got three good cuts out of it — just $4.33 per meal. That’s a win.

Now I just needed the perfect cooking method.

Reverse sear won by a landslide. Tender, evenly cooked, beautifully crusted — every time. I’m hooked.

Here’s how to do it.


How to Reverse Sear a Steak (No Grill Required)

Step 1: Prep Your Steak

  • Start with a thick cut — at least 1.5 inches.
  • Pat it completely dry.
  • Season generously with kosher salt and pepper.
  • Add garlic powder or any spices you love.
  • Place on a wire rack (I use my air fryer basket).

Step 2: Slow Cook

  • Preheat your oven to 250°–275°F.
  • Place the steak on the rack over a baking sheet.
  • Bake for 30–50 minutes, until the internal temp reaches 115°F for rare.
    • My smaller steaks usually hit this around the 30‑minute mark.

Step 3: High‑Heat Sear

  • Heat your cast iron skillet over high heat until it just starts to smoke.
  • Add a high‑smoke‑point oil (canola, vegetable, avocado).
  • Sear the steak 60–90 seconds per side until a deep brown crust forms.

Step 4: Rest and Serve

Because the steak cooked low and slow, it barely needs resting. A minute or two is plenty.


Notes & Tips

  • Many recipes suggest salting the steak and leaving it uncovered in the fridge for up to 24 hours. I haven’t tried it, but it’s supposed to improve the crust. If you test it, report back.
  • If you don’t mind smoke, add a pat of butter during the sear for extra flavor — just know it will burn.
  • A probe thermometer is essential to avoid overcooking before the sear.
  • A dry, heavy skillet (cast iron is best) gives the best crust. Make sure it’s screaming hot.
  • Add aromatics (butter, garlic, herbs) during the last minute of the sear and baste for extra flavor.

Regular Sear vs. Reverse Sear

You be the judge. I know which one I prefer — and I’d love to hear which method wins in your kitchen.