The Great Aluminum Foil Mystery

Shiny Side Up? Shiny Side Down? The Great Aluminum Foil Mystery, Solved


Shiny Side Up? Shiny Side Down? The Great Aluminum Foil Mystery, Solved

There’s an old saying about keeping the sunny side up and the dirty side down. Lovely advice for life — less helpful when you’re standing in the grocery aisle staring at aluminum foil, wondering which side is supposed to face the food.

And yes, I’ve wondered. More than once.

I still remember the first time that distinctive yellow‑and‑blue Reynolds Wrap Non‑Stick box caught my eye. It was noticeably pricier than the plain roll — especially if you weren’t splurging on Heavy Duty — but curiosity won. One roll later, I was a convert. Some chefs swear by the non‑stick variety exclusively, and honestly, I get it. It’s a little luxury that solves a lot of kitchen annoyances.

But because it is expensive, I keep both kinds on hand. If I’m tenting a turkey, the foil is just draped loosely over the top — no need for the fancy stuff. But if I’m lining a pan for easy cleanup and the food is going directly on the foil? Non‑stick, every time. It earns its keep.

And that brings us back to the question that’s been itching at the back of my brain:
Does shiny side up or shiny side down actually matter?

Turns out… not even a little.


Why Foil Has a Shiny Side (and Why It Doesn’t Matter)

The shiny/dull thing isn’t a design choice — it’s a manufacturing quirk. And because I can’t resist channeling the popular TV show How It’s Made, let’s take a quick trip down the assembly line and unravel this mystery.

In the final stage of production, called cold‑rolling, two sheets of aluminum are rolled together.

  • The side touching the rollers becomes shiny.
  • The side sandwiched between the sheets becomes dull.

That’s it. No secret coating. No special heat properties. No culinary conspiracy.

According to food scientist Lara Tiro, the two sides are identical in material and performance. Reynolds themselves say you can use either side — whichever makes you feel like a kitchen wizard.

So if you’ve been carefully orienting your foil like you’re aligning solar panels… you can relax now.


The One Exception: Non‑Stick Foil

Non‑stick foil is the diva of the foil world — and I say that with love.

It does have a coating, but only on the dull side.
That’s the side your food should touch.

If you’ve ever baked fish, roasted potatoes, or made chicken nuggets that welded themselves to regular foil, non‑stick feels like a small miracle. It’s pricier, yes, but it’s also the difference between “slides right off” and “why is my dinner glued to the pan?”


Can You Reuse Foil? Sometimes.

Foil can be reused if it’s still clean and intact. But toss it if it has:

  • Grease soaked in
  • Heavy acidic residue (tomato sauce, citrus, vinaigrettes)
  • Moisture that could harbor bacteria
  • Rips or tears

A gently used sheet from covering leftovers? Absolutely reusable. A sheet that survived a lasagna? Let it go.


Where Foil Really Shines: The Grill

If aluminum foil has a natural habitat, it’s the grill. This is where it stops being a humble kitchen helper and becomes a full‑blown problem‑solver. Foil packets keep vegetables tender, fish from falling through the grates, and marinades exactly where you want them. It’s also the easiest way to keep your grill clean — a small miracle when you’re cooking something saucy or sticky.

Regular foil works beautifully for most grilling jobs, but this is another place where non‑stick foil earns its keep. Anything delicate — fish fillets, sliced zucchini, marinated chicken — releases cleanly instead of welding itself to the metal like it’s auditioning for a permanent position.

When Not to Use Foil

Even the kitchen MVP has its limits:

  • Brining meats: salt can react with aluminum
  • Browning: foil traps moisture and prevents crisping
  • Storing leftovers: foil isn’t airtight
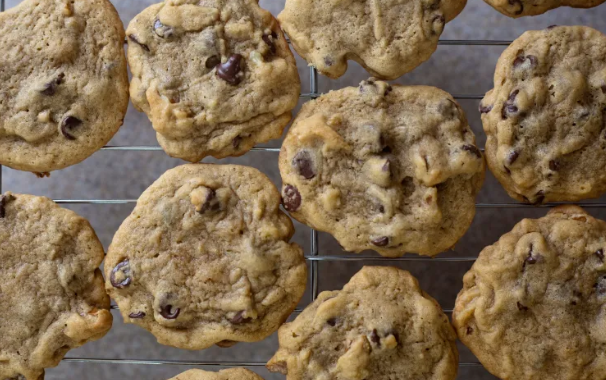
  • Baking cookies: bottoms brown too fast — use parchment or silicone

So… Shiny Side Up or Down?

Use whichever side makes you happy.
Use non‑stick when you want your food to behave.
And keep the sunny side up — unless you’re a sheet of foil, in which case both sides are just doing their best.


Crustless Pizza Casserole


How does a crustless pizza stand up to a homemade deep dish pizza like we have here

Is a pizza without crust still a pizza? You be the judge.

It seems like I’ve been doing a lot of baking this spring and sharing the results here, of course. I do know how to cook meals, not just bake — as you know from the pork chop series, I’m a versatile cook. But my personal favorites usually lean more Italian. Spaghetti, lasagna, pizza… you get the idea.

Stuffed shells anyone or a simple crustless PizzaRecently I had some ricotta left over and wanted to try my hand at stuffed shells, but believe it or not, I couldn’t find any big shells to stuff. And if you think I’m going to stand there trying to fill those tiny little shells, you are so wrong. Crazy I’m not — only slightly demented.

Anyway, I ran across another interesting recipe, and it looked good. So of course I had to give it a try. I don’t know who to credit for the idea, but it worked great. So without further ado, straight from Dusty’s Test Kitchen, I give you…

Meat Lover’s Pizza Casserole

This is for the crust‑challenged — the folks who don’t want to run to the store for premade crusts but still crave a nice, juicy pizza. Full of cheese and meat, this casserole gives new meaning to the phrase “have it your way.” Lots of options to make it uniquely yours.


Ingredients

  • 1/3 lb ground beef
  • 1/2 lb Italian sausage
  • 1/2 cup pepperoni slices
  • 1/2 cup cooked bacon, crumbled
  • 2 cups sauce — marinara or pizza sauce (you choose your vibe)
  • 8 oz rotini or penne pasta
  • 2 cups shredded mozzarella
  • 1/2 cup shredded cheddar or provolone (optional)
  • 1/2 cup sliced black olives (optional)
  • 1/2 cup sliced mushrooms (optional — see Notes)
  • 1 tsp Italian seasoning
  • 1/2 tsp garlic powder
  • 1/4 tsp black pepper
  • Salt to taste

Instructions

  1. Preheat oven to 375°. Lightly grease a 9×13 baking dish and set aside.
  2. Heat a large skillet over medium heat. Add the ground beef and Italian sausage. Break apart and cook until fully browned. Drain excess fat (see Notes).
  3. While the meat is browning, bring a pot of salted water to a boil and cook the pasta according to package directions. Drain and set aside.
  4. Stir in 1/2 cup pepperoni slices and 1/2 cup crumbled bacon. Let everything warm through for about 1 minute.
  5. Add 2 cups sauce, Italian seasoning, garlic powder, black pepper, and salt to taste. Stir and let simmer 2–3 minutes.
  6. In a large bowl, combine the cooked pasta and meat sauce mixture. Add 1 cup mozzarella and stir until evenly mixed (see Notes).
  7. Spread the mixture evenly in the prepared baking dish.
  8. Sprinkle with the remaining mozzarella, the cheddar or provolone, and any optional toppings like mushrooms or olives.
  9. Cover loosely with foil and bake for 15 minutes. Remove foil and bake an additional 10–15 minutes, until the cheese is melted, bubbly, and lightly golden… or until you can’t resist the aroma any longer.

Let rest 5 minutes before serving so it holds together when scooped.


Notes

  • I’m not a sausage fan, so in my version I swapped the Italian sausage for another 1/2 lb of hamburger.
  • The recipe calls for a large skillet, and normally I’d grab my trusty cast iron, but this time I used my nonstick double‑handled pot. It browns meat nicely and gives me room to mix everything without dragging out a bowl. One‑pot cooking = simplified cleanup.
  • I had jarred marinara in the pantry, so that’s what I used. You can choose marinara or pizza sauce depending on the flavor profile you want.
  • About mushrooms: They hold a lot of water. If you don’t want them soggy or adding extra moisture, sauté them first. A tablespoon of oil, a sprinkle of garlic powder, and 5–7 minutes over medium heat will give you perfect, flavorful mushrooms.
  • I like onions and forgot to add them — they’d be great here, along with sliced peppers if you’re a green‑pepper fanatic. I also added extra pepperoni on top even though some was already mixed in.


Why You’ll Love This Recipe

  • All the pizza flavor, none of the crust drama. No rolling, no rising, no flour all over the counter — just the good stuff.
  • Totally customizable. Pepperoni, bacon, sausage, mushrooms, olives, onions, peppers… mix and match your favorites.
  • One‑pot friendly. Brown the meat, mix it all together, bake, done. Cleanup stays blissfully simple.
  • Great for leftovers. It reheats beautifully and tastes just as good the next day.
  • Crowd‑pleasing comfort food. Whether it’s a weeknight dinner, a cozy weekend meal, or a good old‑fashioned church potluck (yes, they’re still a thing), this casserole is the kind of dish that disappears fast and gets people asking for the recipe.

The result is a very yummy dish that mimics pizza without the crust. I’ll definitely make it again.

Try it, tweak it, claim it as your own — I won’t tell. Make it, bake it, take it to a potluck… and then take a bow. Just save me a scoop.


America Runs on Dunkin

Why America Runs on Dunkin. Move over Starbucks


☕ Dunkin’ vs. Starbucks: A Very Boston Love Story

Why Dunkin’ Is Practically a State Symbol

In Massachusetts, “grabbing a coffee” is basically code for “heading to Dunks.” We don’t even bother with the full name anymore — it’s just Dunks, like it’s a cousin we see every day. And with close to 1,100 Dunkin’ locations across the state, outnumbering Starbucks 4‑to‑1, it’s not exactly hard to find one. Honestly, you could blindfold someone, spin them around, and they’d still bump into a Dunkin’ before they hit a mailbox.

Starbucks? That’s for Visitors

Look, Starbucks has its place… mostly in airports and places where people say “cof-fee” instead of “caw-fee.” But here? In Boston? Walking into a Starbucks feels like announcing you think Tom Brady was “pretty good, I guess.” It’s not wrong, but it’s definitely suspicious.

Starbucks drinks come with names longer than the Mass Pike. Meanwhile, Dunkin’ gives you a medium regular and sends you on your way. No dissertations required.

Dunks Is a Lifestyle, Not a Beverage

Dunkin’ is woven into the daily rhythm of New England life — early‑morning commutes, post‑game pick‑me‑ups, and that comforting moment when the person behind the counter knows your order before you open your mouth. It’s the only drive‑thru where you’ll see someone in pajama pants, a Bruins hoodie, and flip‑flops in January, and no one bats an eye.


The Commercials Are Basically Local Cinema

And the ads? Pure gold.
We’ve got Gronk and Big Papi singing like they’re auditioning for a musical nobody asked for.

We’ve got Ben Affleck showing up like the unofficial mayor of Dunkin’, running the drive‑thru, handing out orders, and looking like he’s living his best life. And yes, yes that is Tom Brady.  These aren’t commercials — they’re documentaries of the Boston soul.

So… Who Wants a Dunks Run

Starbucks may have its fans, but here in Massachusetts, Dunkin’ isn’t just coffee. It’s identity. It’s culture. It’s home.

And now I kinda want a donut.


To Break or Not to Break- the Great Spaghetti Debate

Lovely long strands of spaghetti with meat sauce. Looks good


🍝 The Great Spaghetti Myth: Why We’re Told Not to Break It (and What Really Happens in the Pot)

Every home cook has heard it at least once — usually from a cookbook, a TV chef, or a well‑meaning relative:

“Never break spaghetti.”

It’s one of those kitchen commandments that gets passed down like gospel, even though most of us have no idea why. I certainly didn’t. I just knew that if I wanted the pasta to fit in my pot, I snapped it in half and moved on with my life.

Then one day I watched a cooking show where the chef placed long, elegant strands of spaghetti into a potPot too small? Lets get to the bottom of the great debate of boiling water… and left the top half sticking straight out like a pasta bouquet. As the bottom softened, the noodles slowly slid into the pot on their own, as if obeying some ancient culinary law.

It looked dramatic. It looked professional.
It also made absolutely no sense to me.

Wouldn’t the bottom half overcook while the top half was still raw?
Turns out — yes. Yes, it would.

So let’s bust this myth properly.


🍝 Myth #1: “Don’t break spaghetti — it’s wrong.”

This one comes straight from Italian culinary tradition. In Italy, pasta shapes are treated with the same respect we give to Thanksgiving turkey or Grandma’s cast‑iron skillet. Long pasta is meant to stay long because:

  • it twirls better
  • it holds certain sauces better
  • it creates a specific eating experience

Breaking it is seen as messing with the design.
But here’s the truth: there’s no practical kitchen disaster waiting for you if you snap a noodle. It’s mostly cultural, not scientific.


🍝 Myth #2: “Let the spaghetti stick out of the pot — it will slide in evenly.”

This one is pure TV magic.

Here’s what actually happens:

  • The submerged half starts cooking immediately.
  • The exposed half stays stiff and dry.
  • The bottom softens, bends, and eventually pulls the top down.

But by the time the top half finally joins the party, the bottom has already been cooking for a minute or two. That means uneven texture unless you’re stirring constantly — which, by the way, TV chefs are doing, just off‑camera.

So no, the “half‑in, half‑out” method doesn’t create some perfect, even cook. It just looks good on screen.


✔️ So what should you do?

The real technique — the one Italian cooks actually use — is simple:

  1. Put the spaghetti in whole.
  2. Let the ends stick out for 20–30 seconds.
  3. As soon as the submerged part softens, gently bend the rest into the water.
  4. Stir early and often.

That’s it. No snapping required, no dramatic pasta fountain, no uneven cooking.


🍝 Or… you can take the modern shortcut

If you don’t want to break spaghetti and you don’t want to deal with the Leaning Tower of Pasta routine, there’s a third option:

You can now buy “Pot‑Sized Spaghetti.”

It’s literally spaghetti that’s already cut to fit a standard pot.
No snapping.
No bending.
No half‑in, half‑out noodle acrobatics.

Just drop it in and go.

Purists may clutch their pearls, but honestly? It’s brilliant for busy home cooks who just want dinner on the table without a philosophical debate about noodle length.


🍽️ The Bottom Line

You can break spaghetti if you want.
You can leave it long if you prefer.
You can even buy the pot‑sized version and skip the whole issue entirely.

But now you know the why behind the myth — and the real science behind what’s happening in the pot.

And honestly? That’s half the fun of cooking: discovering that the rules we’ve been following forever sometimes have more to do with tradition than technique.

Mangia!


Chocolate Chip Banana Bread

Warm, fragrant, the fresh baked indulgence of Chocolate chip banana bread


April Showers Bring… Banana Bread?

With spring in the air, I’m just waiting for those April showers to make their appearance. We need them for the May flowers, after all. And on those wet, dreary days that pop up here and there, my mind always wanders to one thing: treats.

Strawberry crêpes? Tempting.
Chocolate cupcakes? Chocolate is good anytime.
Blueberry muffins? Always a favorite.
Carrot‑cake‑everything? I’ve been seeing recipes everywhere lately, and I love carrot cake… but that’s not quite what I’m craving either.

Then it hit me.

Banana bread.
But not just any banana bread — Chocolate Chip Banana Bread.

It’s been a while since I made this recipe, and I already know I’m going to enjoy every slice.


Chocolate Chip Banana Bread

Ingredients

  • 3 bananas
  • 1 stick of butter
  • 2 eggs
  • 1 ½ cups sugar
  • ½ cup buttermilk
  • 1 teaspoon vanilla extract
  • 2 ½ cups all‑purpose flour
  • ½ cup chocolate chips
  • 1 teaspoon baking soda
  • 1 teaspoon salt
  • ½ cup chopped walnuts (optional)

Directions

  1. Preheat oven to 350° and spray the bottom of a 9×5 loaf pan with cooking spray.
  2. Peel and mash the bananas until almost smooth.
  3. Melt the butter in a saucepan.
  4. In a large mixing bowl, combine the bananas, melted butter, eggs, sugar, buttermilk, and vanilla.
  5. Add the flour, chocolate chips, baking soda, salt, and optional walnuts. Stir just until the flour is moistened, then add to your prepared loaf pan.
  6. Bake for 1 hour and 15 minutes, or until a toothpick inserted in the center comes out clean.
  7. Remove from the oven and cool for at least 5 minutes. Run a knife around the edges, then transfer the loaf to a wire rack to finish cooling.


Note

The bread slices much more cleanly once it has cooled completely — if you can wait that long.


Doesn’t it smell amazing? And it comes out so beautifully every time. I hope you enjoy a slice or two as much as I do.