Quick and Easy Deep-Dish Skillet Pizza


Everyone knows how much I love skillet cooking, especially when it involves my trusty cast‑iron pans. I’ve shared plenty of skillet recipes over the years and I still make every single one. So let’s dive into this one, shall we?

This recipe isn’t mine. I stumbled across it quite by accident, and I’m so glad I did. It’s the creation of Kelly Senyei, who shared it on her site Just a Taste. If you want to see her original post, notes, or comments, you can find them there.

Why This Pizza?

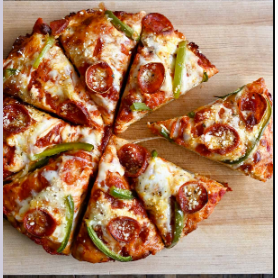
I’m not a huge pizza fanatic. I enjoy a slice now and then, but honestly, there are plenty of other things—like a good cheeseburger—that I’d pick first. Still, out of nowhere, I found myself craving a gooey, onion‑mushroom‑pepperoni pizza loaded with cheese.

What I didn’t want was to spend $20 on delivery.

I started by searching for tips on preparing mushrooms for pizza (do you cook them first? use canned? toss them on raw?).

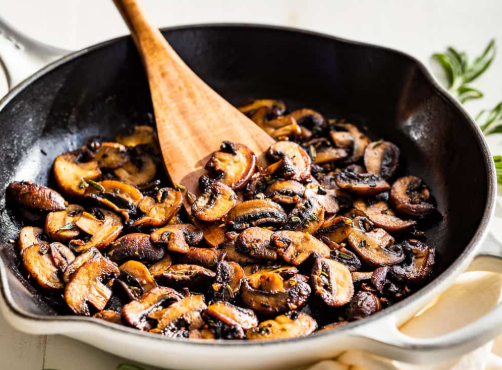
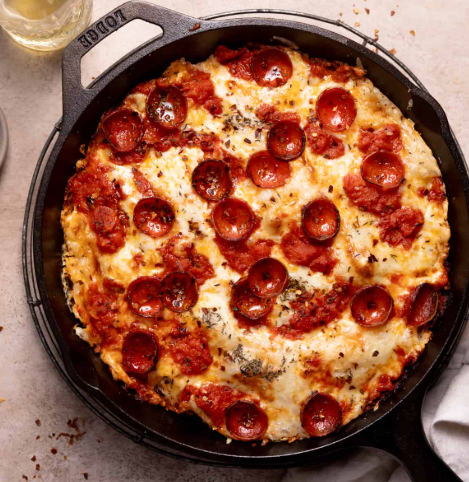
Somewhere in that rabbit hole, I found Kelly’s skillet pizza recipe. Her version makes a deep‑dish pie with a wonderfully crispy crust, and she includes plenty of shortcuts that make it perfect for a weeknight dinner.

When she says ready in 15 minutes, she means it. I didn’t believe it at first—how could a crust cook that fast? But I was wrong. It works, and it’s delicious.

The only change I’d make next time is to use half the dough. I like deep dish, but this one came out a little thicker than I prefer.

So here we go—enjoy!


Kelly’s Thick‑Crust Skillet Pizza

Ingredients

  • 1 pound homemade or store‑bought pizza dough, at room temperature
  • Extra‑virgin olive oil, for coating the pan
  • 3/4 cup marinara sauce (homemade or store‑bought)
  • 1 1/2 cups shredded mozzarella cheese
  • Assorted pizza toppings

Instructions

  1. Preheat the oven to 500°F, placing a rack in the center.
  2. Coat the bottom and sides of a 10‑ or 12‑inch cast‑iron skillet with 2 tablespoons olive oil. Add the dough, turning to coat, then press it out to the edges. (You can also roll it out first, then place it in the pan.)
  3. Spread the sauce evenly over the dough. No need to leave a border. Sprinkle with cheese and add your toppings.
  4. Bake until the crust is dark golden and slightly crispy—10 to 15 minutes.
  5. Let the pizza cool in the pan for 5 minutes before removing, slicing, and serving.

Deb’s Notes

I was in a hurry, so I grabbed store‑bought dough. I let it sit on the counter while I put away groceries so it could warm up. Mine was garlic‑flavored, but my store had all kinds—beer dough, basil, sourdough, you name it.

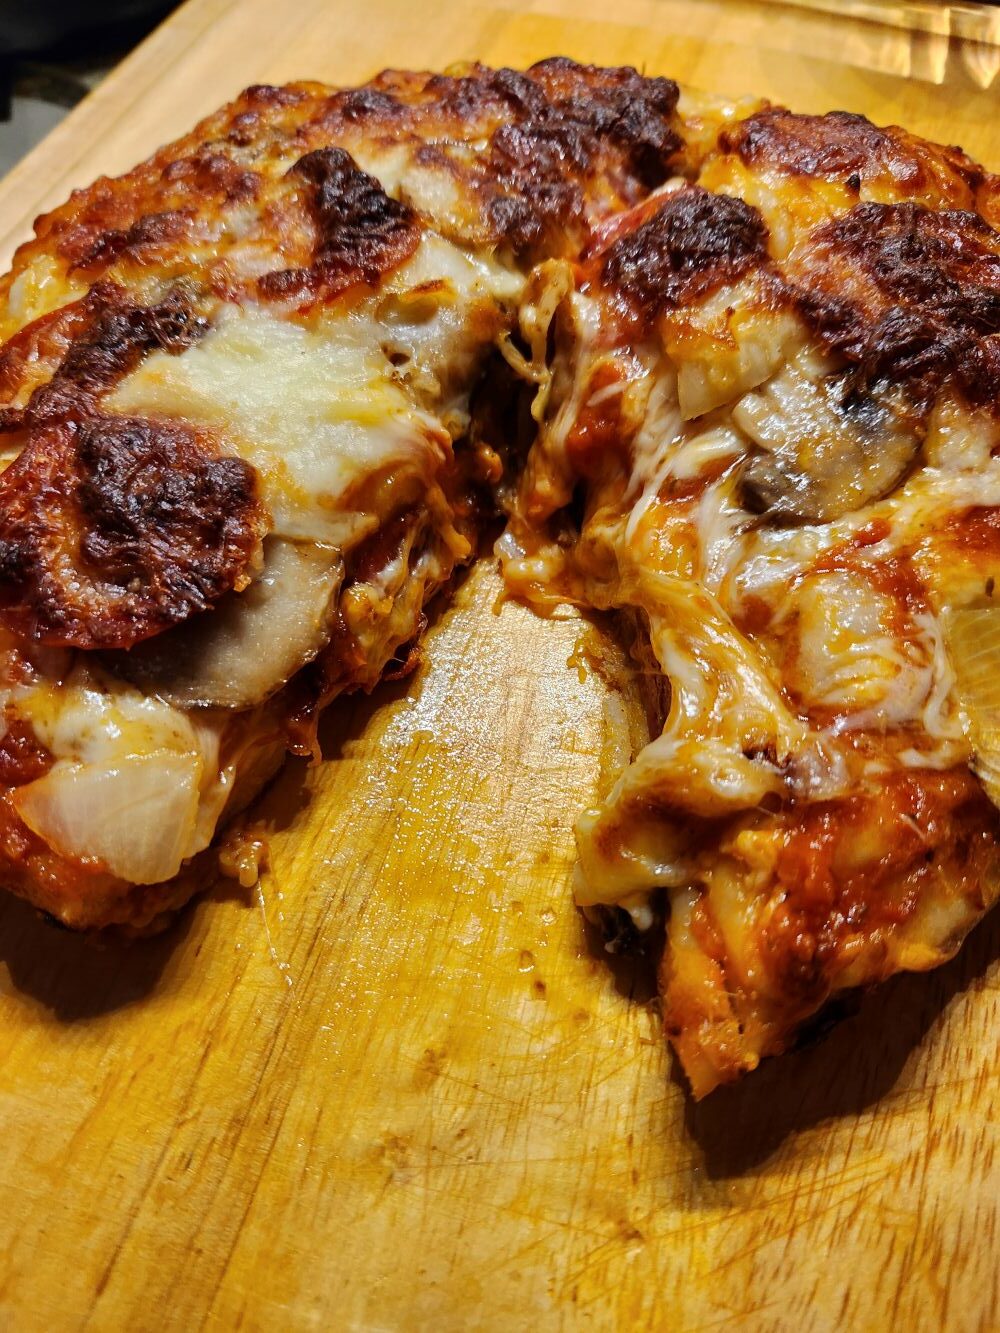
The recipe calls for 1 pound of dough. My package was 1 lb. 4 oz., and with my tiny kitchen scale I couldn’t divide it accurately. That extra dough probably explains why my crust came out a bit thicker than I like, but it still spread beautifully in the cast‑iron pan once it warmed up.

I also used store‑bought pizza sauce because this was not a “from‑scratch” kind of day.

About the toppings…

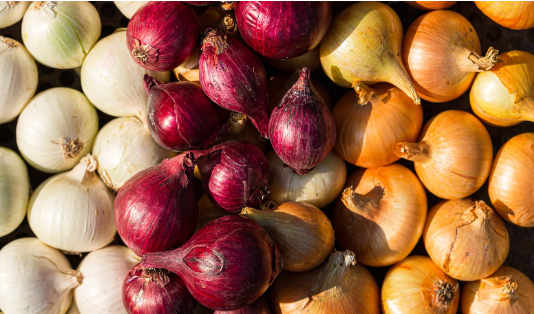
Mushrooms absolutely need to be cooked first. I had a small container of sliced fresh mushrooms, so I sautéed them in a little oil with a good dash of garlic—2 to 3 minutes per side over medium heat. Then onto the pizza they went.

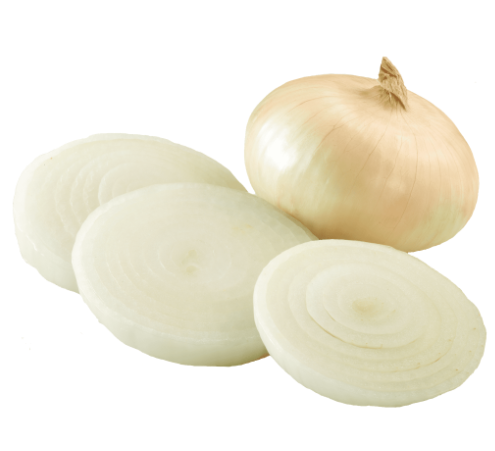
I added onions and pepperoni, topped everything with shredded mozzarella, and into the oven it went.

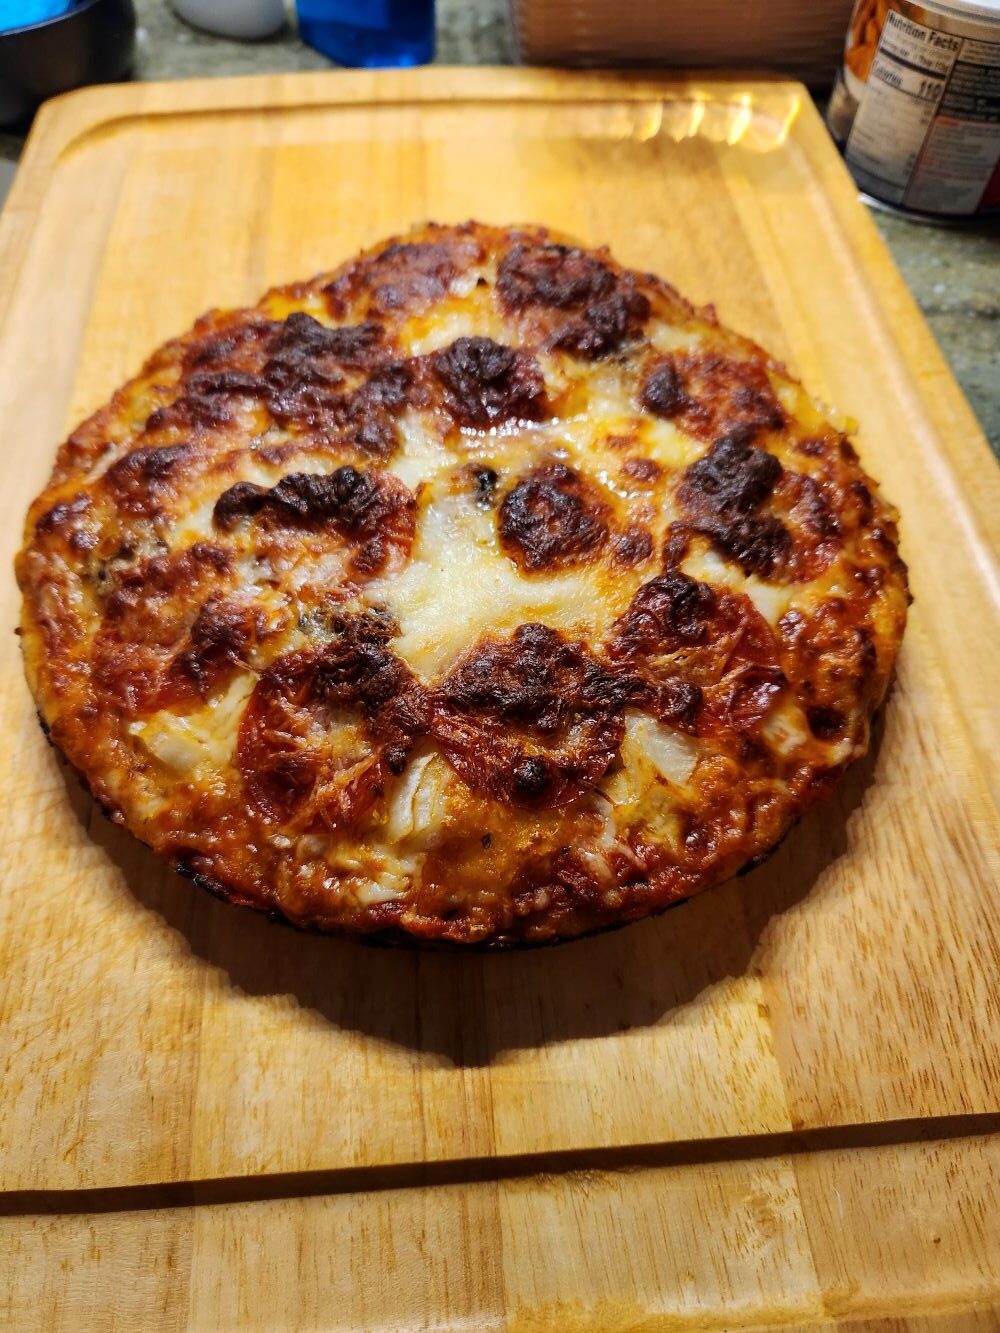
Fifteen minutes later, I had a gorgeous, crispy pizza. I let it rest for 5 minutes, then used a spatula to lift it out of the pan. It was outstanding.

If you’re a purist and want to make your dough and sauce from scratch, Kelly has recipes for both on her blog. I highly recommend checking them out to fine‑tune your perfect pizza.

Enjoy!


The Springform Pan


A Baker’s Quiet Hero

Affiliate Disclosure: As an Amazon Associate, I may earn a small commission from qualifying purchases at no additional cost to you. I only recommend products I use and love—or, in this case, desperately need to replace.


When You Realize Something’s Missing

I’m not sure when it happened, but somewhere between moves, reorganizations, and the general chaos of life, my trusty set of springform pans vanished. Poof. Gone. I don’t bake cakes often, so I didn’t notice their absence until recently, when I made a Ring Ding cake and found myself wrestling with the crème filling. Getting a smooth, even layer without the sides bulging out was… let’s just say, a challenge.

That’s when the lightbulb went off. A springform pan would have kept everything neatly contained while I assembled the layers. Bottom layer in, filling added, top layer placed gently on—no sliding, no spilling, no stress. Then just pop the latch, lift the ring, and frost with ganache. Easy. Or it would have been easy, if I could have found my pan.

The Universe Sends a Hint

As if to drive the point home, two ice cream cake recipes landed in my lap right after that. Delicious? Absolutely. But both required—you guessed it—a springform pan. At this point, I had to laugh. The universe wasn’t being subtle. It was time to replace the set I’d somehow misplaced.


Shopping Smart: Amazon or Welcoming Haven?

Sure, Amazon has a huge selection, and I could have ordered one in a heartbeat. But as the owner of Welcoming Haven, I’d be foolish not to check my own shop first. And wouldn’t you know it—I do carry a beautiful set of springform pans. Shop link here


These pans are crafted with a durable nonstick coating and a secure latch design that ensures smooth release and picture‑perfect results. No sticking, no crumbling crusts, no frustration. Exactly what I needed.

Features That Make Baking Easier

  • Effortless Release: The classic springform latch opens smoothly, letting your creations lift out cleanly.
  • Nonstick Performance: A premium coating keeps your cakes intact and makes cleanup a breeze.
  • Removable Bottom: Perfect for cheesecakes, tarts, layered cakes, and anything delicate.
  • Multi‑Purpose Design: Great for deep‑dish pizza, quiches, breads, and more.
  • Durable Construction: Built from heat‑resistant materials that hold up to frequent baking.
  • Sleek Black Finish: A modern, professional look that fits beautifully in any kitchen.

Ready for the Next Baking Adventure

So yes—I’m placing my order. The next time I tackle a delicate dessert or a recipe that needs a little finesse, I’ll be ready. No more improvising, no more wrestling with fillings, and definitely no more missing pans.

If you’re in the same boat—or if your springform pans have mysteriously wandered off too—you can find the set at Welcoming Haven. Your future cakes will thank you.


The Wonderful World of Onions


🌾 Onions: Types, Uses, Tears, and Tips

Walk into any grocery store and you’ll find yourself staring at a mountain of onions—golden, white, red, long, leafy, sweet, mild, spicy, and everything in between. For something so humble, onions have an impressive amount of personality. They’re the backbone of countless recipes, the secret to deep flavor, and—let’s be honest—the reason many of us have cried in the kitchen more than once.

Let’s explore the different kinds of onions, what they’re best for, why they make us tear up, and how to chop them without freezing your fingers off.


Yellow Onions: The Everyday Workhorse

Yellow onions are the all‑purpose pick for sautéing, braising, caramelizing, and building flavor. Affordable, accessible, and reliable, they’re my go‑to for almost any cooked dish.

Red Onions: Colorful and Bold

If onions had a fashion show, red onions would strut the runway. Their bright color and mild bite make them perfect for salads, sandwiches, and salsas. At recent visit to my local sub shop I was surprised when they asked me if I preferred white or red onion on my sub! I guess they think they are going gourmet.


White Onions: Mild and Crisp

My first white onion arrived by accident via DoorDash, but it turned out to be perfect on a hamburger. Mild, crisp, and great raw they were the perfect size on my burger. They also shine in Mexican dishes.

Spanish Onions: The Big Cousins

For years I thought yellow onions had shrunk—turns out Spanish onions are simply larger and milder. Great for roasting or stuffing.

Sweet Onions: Vidalia and Friends

Vidalia onions are the most famous sweet onion, but only those grown in Georgia can claim the name. Sweet onions caramelize beautifully and make excellent onion rings.

Shallots, Scallions, and Leeks

Shallots are delicate and lightly sweet, scallions add freshness and color, and leeks offer a buttery mildness perfect for soups. And another aside,, I personally love shallots. They are delicate and sweet. I was pleasantly surprised the first time I used them but don’t run out and stock up, they don’t keep well. Best if used right away.


Are They Interchangeable?

Usually, yes. They’re all part of the same species, but each has its own flavor and texture. In a pinch, swapping won’t ruin your dish.


Other Onion Relatives

Garlic, chives, and pearl onions all share the family tree. Pearl onions, often sold frozen and pre‑peeled, are adorable and great for roasting or stews.


Onion Storage Tips

Choose firm onions with dry skins. Store in a cool, dry place with airflow. Once cut, refrigerate in an airtight container and use within seven days.


Why Onions Make Us Cry

Cutting an onion releases a gas called syn‑propanethial‑S‑oxide, which irritates the eyes and triggers tears. (Your science tip of the day)


Cutting Onions Without Tears

I avoid freezing or running water because cold hands are not my idea of fun. Instead:

  • Cut the onion in half
  • Slice vertically, keeping the root intact
  • Add one horizontal slice if needed
  • Slice downward from tip to root

Leaving the root intact helps keep the tear‑triggering compounds contained.


⚠️ A Note for Pet Owners

Onions are toxic to both cats and dogs and can cause dangerous red‑blood‑cell damage leading to hemolytic anemia. Even small amounts—raw, cooked, powdered, or dehydrated—can be harmful. Keep onions and onion scraps safely out of reach of pets.


Final Thoughts

I hope this guide helps demystify the onion bin and gives you confidence to choose the right onion for every dish. May your future onion adventures be flavorful, tear‑free, and warm on the fingers.


A Holiday Tradition- The Cookie Exchange

Celebrating National Cookie Exchange Day: Sweet Treats & Sweeter Traditions

There’s something extra special about December 22nd—National Cookie Exchange Day. It’s the unofficial kickoff to that delightful moment when kitchens everywhere turn into flour‑dusted wonderlands, ovens hum like old friends, and neighbors appear at your door with tins full of sugary surprises. Around Dusty Roads, we’re all about celebrating the small joys that make a season feel special, and a cookie exchange is one of those traditions that warms the heart as much as the home.

Why Cookie Exchanges Are Pure Holiday Joy

Cookie exchanges aren’t just about the treats—though let’s be honest, that’s a pretty big perk. They’re about community, creativity, and the simple pleasure of sharing something homemade. Whether you’re a seasoned baker with a signature cookie or someone who relies on the “add water and stir” method (no judgment here), there’s room for everyone at the cookie table.

Plus, you walk away with a variety of cookies without having to bake a dozen different recipes. Efficiency and sugar? A winning combination.

Mom’s Recipe Corner: A Cookie Worth Exchanging

Of course, no cookie exchange is complete without a recipe that earns a few “Who made these?” whispers. So we’re dipping into Mom’s Recipe Corner for a tried‑and‑true classic: Chocolate Peppermint Pinwheel Cookies—a soft, spiced, crowd‑pleasing cookie that looks festive without requiring a culinary degree.

This cookie is a version of the classic Chocolate and Vanilla Icebox cookie. It was a staple of my youth. I admit it took more than a few tries to get the peppermint right. If the candy isn’t crushed enough your cookies are going to spread in the oven. But they still will taste good.

I found this recipe fun to play with. Sometimes I’d use white chocolate and 3 layers of dough so you got more swirls.

Let your imagination rule the day! Then , of course, share the bounty.

Share the Sweetness

Whether you’re hosting a cookie exchange, joining one, or simply gifting a plate to a neighbor, today is all about spreading joy one bite at a time. So preheat that oven, put on your coziest playlist, and let the holiday spirit rise—just like your cookies.


If you want more recipes for your exchange, Mom’s Recipe Corner is always cooking up something delicious.

Lemon Chicken & Rice

🍋 When Life Gives You Shriveling Lemons…

Last grocery trip, I grabbed a bag of lemons for haddock night. It was cheaper by the bag than buying just one or two. Fast forward a few days, and those leftover lemons were looking a little sad—shriveling skin, tough rind, not exactly zest-worthy. But waste not, want not!

No fresh fish in the house, but I did have chicken breasts in the freezer. And so, lemon chicken and rice was born.


🥣 Setting Up the Breading Station

I’ll admit it—I hate the mess of breading stations. But sometimes you just have to go with the flow. Here’s how I set mine up:

  • Bowl 1: Flour for the base
  • Bowl 2: Beaten eggs for the glue
  • Bowl 3: Bread crumbs mixed with grated Parmesan for the crust


🔪 Prepping the Chicken

Out came my trusty fillet knife. I sliced the chicken breasts into cutlets, then pounded them to about ¼-inch thickness (great stress relief, by the way).


🍳 Into the Skillet

I heated 3 tablespoons of vegetable oil in a skillet over medium heat. Each cutlet went through the flour, egg, and breadcrumb routine before hitting the pan.

Cook until golden and crisp, turning once—about 6–8 minutes total. For safety, check with an instant-read thermometer: you’re looking for 165°F.


🧈 The Butter-Lemon Sauce

This is the magic that ties it all together.

  1. Wipe the skillet clean.
  2. Melt butter, stirring constantly.
  3. Add garlic and onion powder, cook for about 1 minute.
  4. Reduce heat to low, then slowly add lemon juice and chicken broth.
  5. Season with salt and pepper, simmer for 3 minutes until slightly reduced.


🍽️ Plating Perfection

On a bed of rice, I arranged lemon slices around the edges, topped with the cutlets, and drizzled that luscious butter-lemon sauce over everything.

Result? Pure comfort food. And honestly, the leftovers taste even better the next day.


👩‍🍳 Final Notes

The full recipe will be posted in Mom’s Recipe Corner at Welcoming Haven once I nail down the exact measurements (I eyeballed everything this time). And seriously—does anyone know how much a “pinch” really is?

Full recipe here